
10 Easy Projects To Make With Leftover Wallpaper
If youve ever completed a wallpaper refresh in your home, youve probably found yourself asking what to do with the wallpaper scraps left behind. Its hard to part with such beautifully designed wallpaper, even if theyre only suitable for an ant-sized room makeover. DIY blogger StacyGrinsfelder felt the same way after wallpapering her front entry, and after seeing the 10 DIY projects she made with her leftover Smooth wallpaper, its safe to say shes found the answer to our wallpaper wonderings!
Stacy: I recently finished a wallpapering project at my house. Even though I cut it very close and used every roll that I ordered, there were still scraps left from trimming the ends. Also, before I made the final choice for our front entry, I had ordered a healthy selection of 2 wide wallpaper samples tooyou can see my sampling process here! The samples and scraps left me with a substantial stack of bits and pieces that I couldnt bring myself to throw away. Instead, I brainstormed a list of ten easy projects for leftover wallpaper, including a few tried-and-true projects already available on the Spoonflower blog.
Danish Star
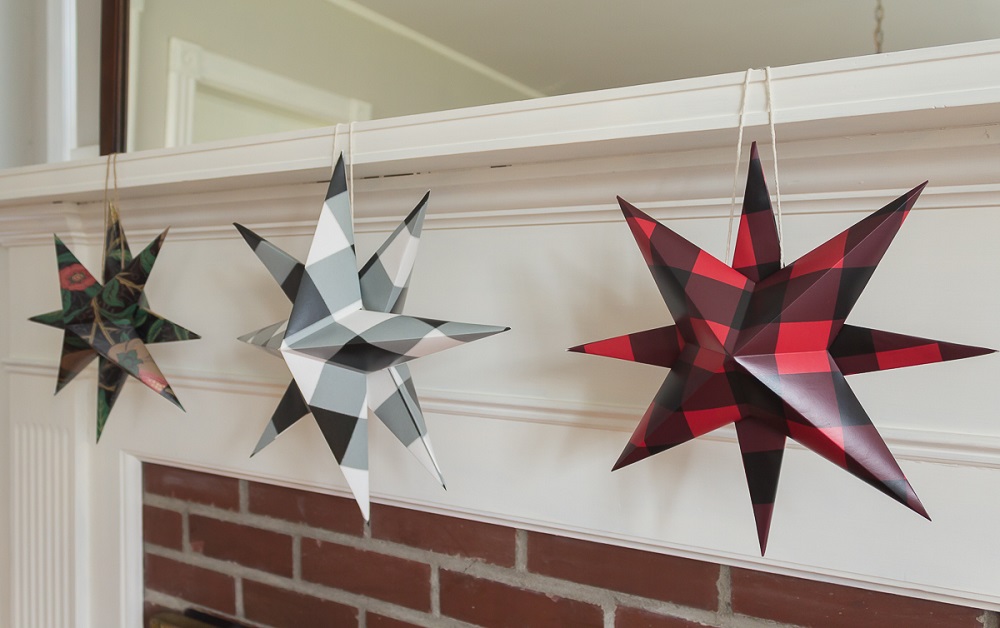
Danish Stars are a simple way to brighten up a fireplace mantel or add a pop of color anywhere. Large-scale Danish Stars are perfect for leftover wallpaper because wallpaper is sturdier than traditional printer paper. I recommend following this tutorial and Ive provided a few of my tips below:
- Press each fold firmly to make sure the paper creases well.
- Use a paper clip to hold the star points together while they dry.
- Activating the paste on the Smooth Wallpaper with water to stick the star points together works reasonably well, but good, strong craft glue or hot glue is best.
Fine Motor Skills Practice For Seniors & Kids
Seniors and kids benefit from practicing their fine motor skills regularly. Large patterns are excellent for tracing or cutting. Donate your leftover wallpaper to nursing homes, senior centers, daycares, or elementary schools.
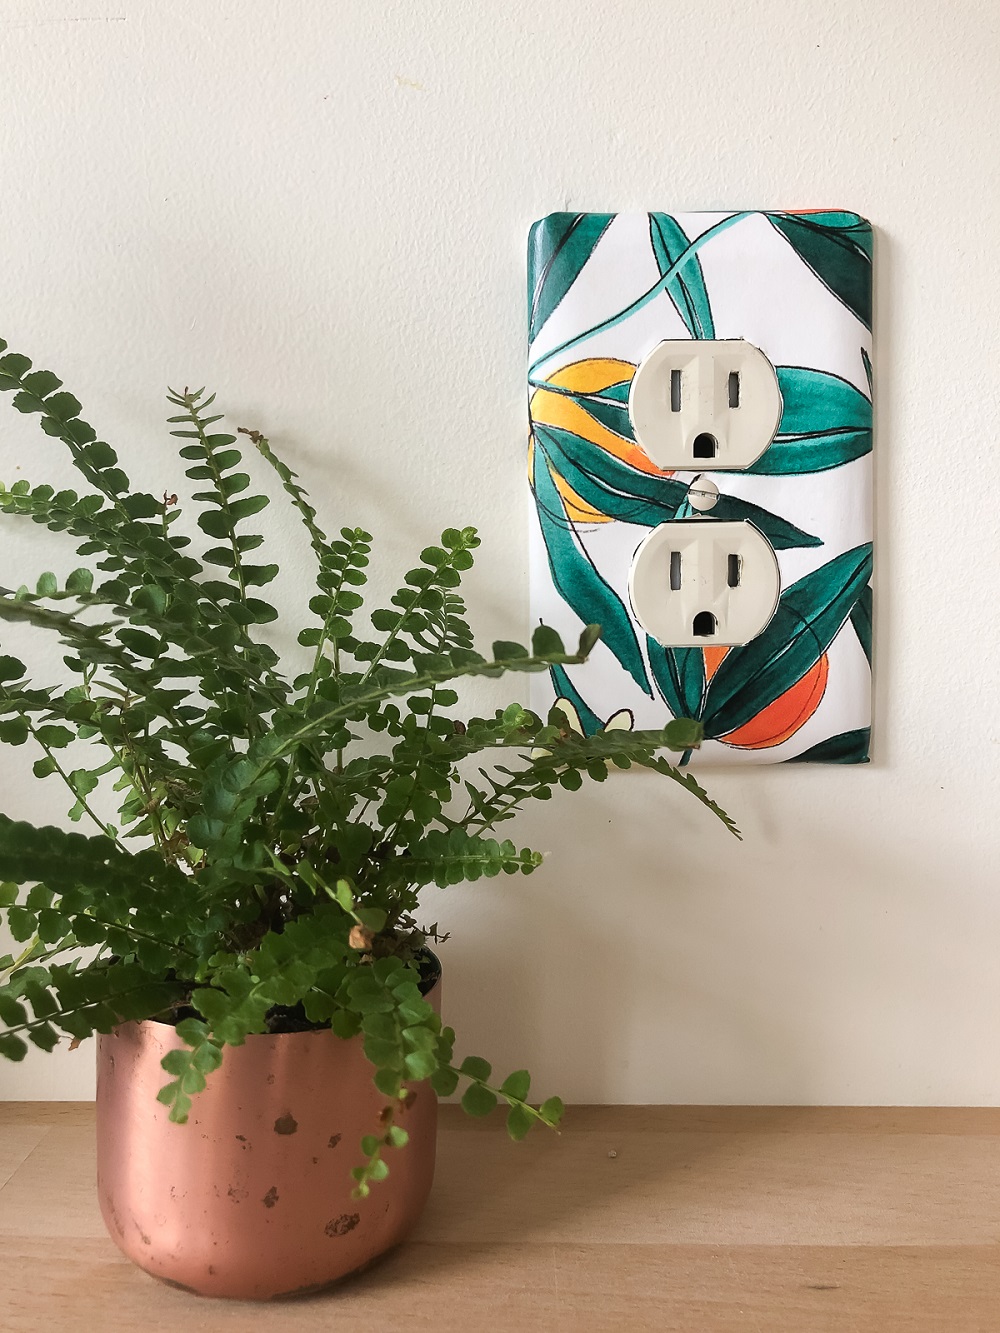
Outlet & Light Switch Covers
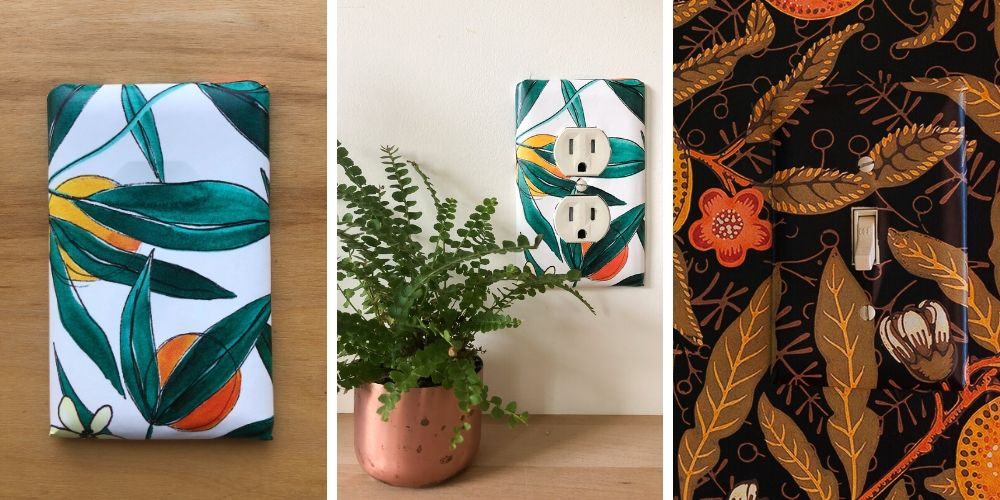
Custom outlet and light switch covers add a sweet finishing touch to any room in the house. Covering them with leftover wallpaper is a quick DIY that makes an impact. This little project works equally well for making a statement or acting as camouflage.
*Be sure to turn off the power before removing any outlet or light switch covers!*
- Cut the wallpaper larger than the light switch cover.
- If youre using the Prepasted Removable Smooth wallpaper, activate the glue by wetting the back thoroughly with a sponge.
- Wait 2-3 minutes.
- Wrap the plastic cover firmly, pressing the cut edges around to the back.Dampen the paper again as needed.
- Set the cover, back side down on a flat surface, and place a heavy book or cutting board on top to keep the paper edges from slipping out.
- Let it dry completely.
- Cut out the holes for the switch or outlets with a sharp utility blade or a precision knife.
- For added durability brush on a layer or two of decoupage glue.
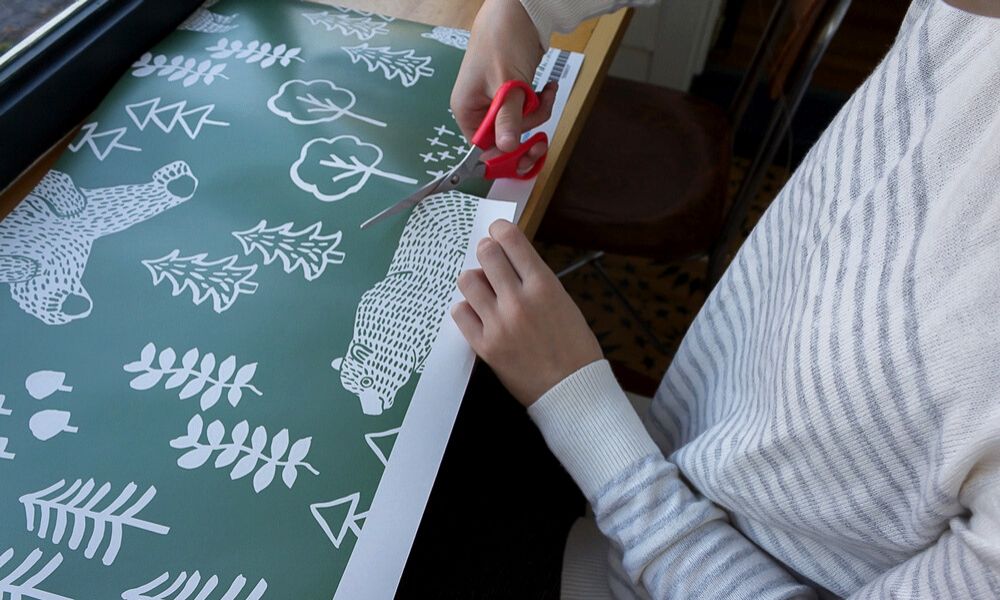
Wallpaper Gift Boxes
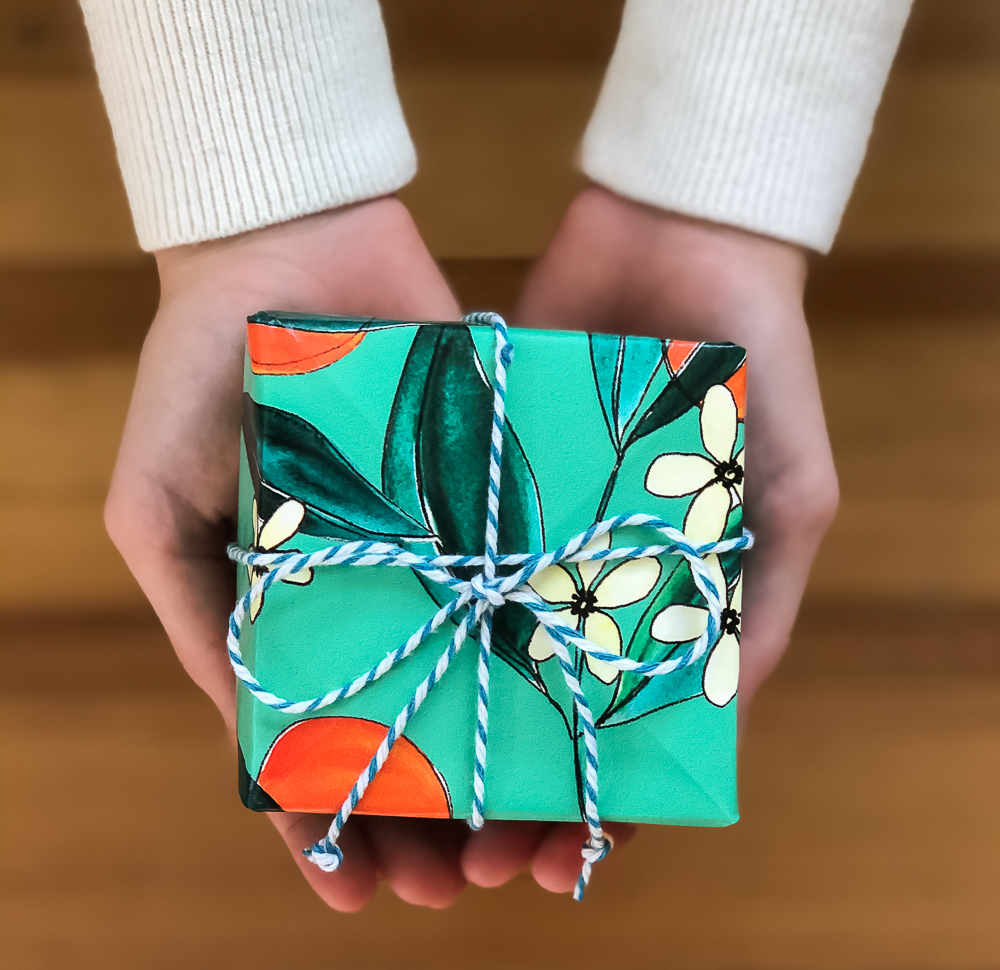
Wallpaper folds beautifully into a sturdy box. First, learn to fold one by following this tutorial. Then, play around with different sized squares. The weight of wallpaper makes it suitable for larger containers, and paper boxes of varied sizes work well as compartments inside of drawers. (KonMari, anyone?) Once you know the basic folds, the skies the limit for your creativity.
Handmade Soap Wrap
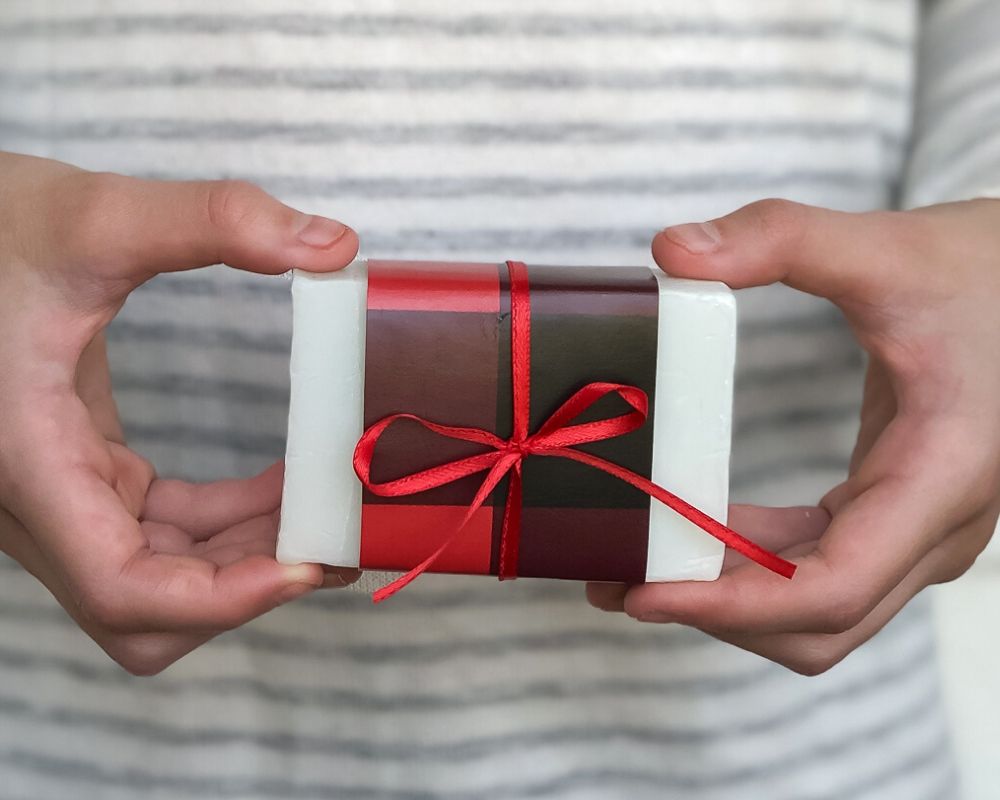
Handmade soap makes a perfect gift either alone or as part of a larger gift basket. Use wallpaper scraps as a colorful wrap, and customize by adding a ribbon or sticker label.
Wrap an LED Candle
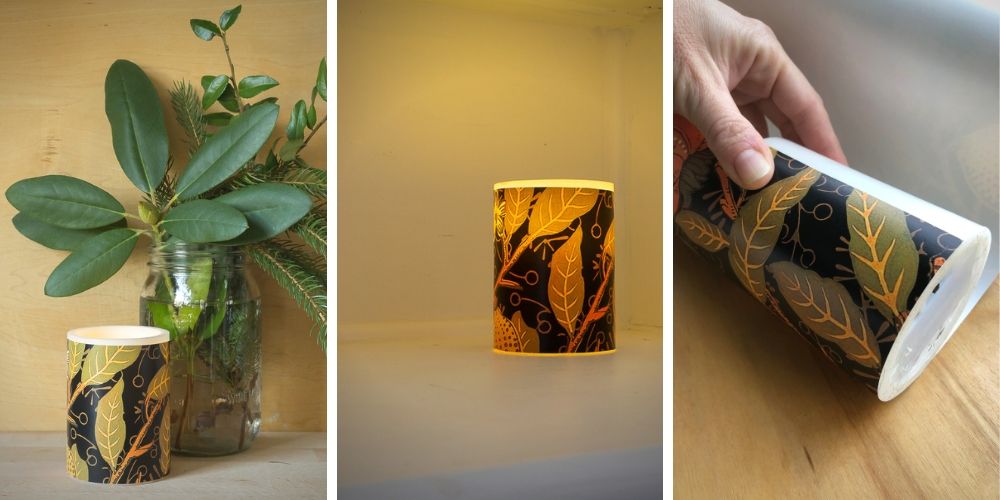
This super easy DIY is a creative, low-cost way to add seasonal decor. To wrap an LED candle:
- Cut a rectangle of paper that fits all the way around the candle but is shorter than the top edge.
- Wrap the candle tightly, and fasten the edges with clear tape.
Make several sleeves in different prints, and swap them out whenever youre ready for a change.
Custom Notebook Cover
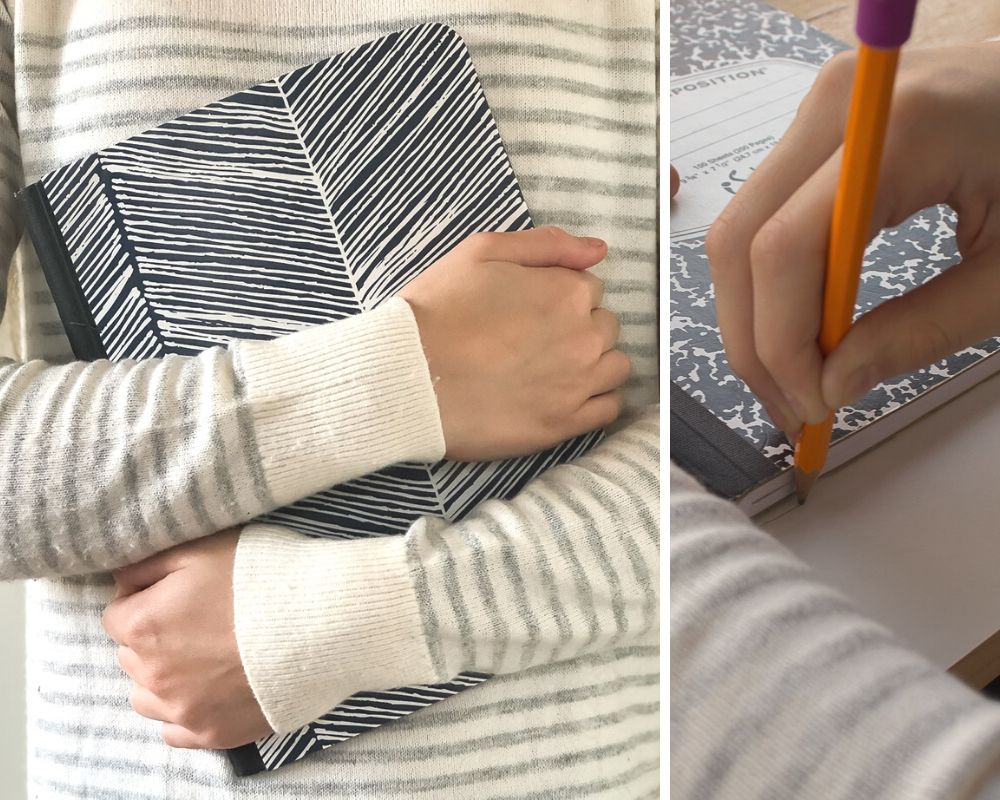
Composition notebooks are just the right size for homework, journaling, or doodling. Personalize the front and back cover with leftover wallpaper.
- Trace the front and back covers of the notebook onto the paste side of the wallpaper. Do not include the binding.
- Cut out the pieces.
- Activate the glue by wetting it thoroughly with a sponge. Alternately, you may use craft glue instead.
- Smooth the pieces onto the front and back of the notebook, excluding the binding.
- While the glue dries, place the notebook under a heavy book or cutting board to keep the wallpaper smooth and pressed firmly to the notebook.
- When the paper is dry, trim off any extra paper.
- For added durability, you may brush on a couple of coats of decoupage glue.
Custom notebook covers make the perfect stocking stuffer.
Find 10 more last-minute stocking stuffer ideas!
Drawer Liners
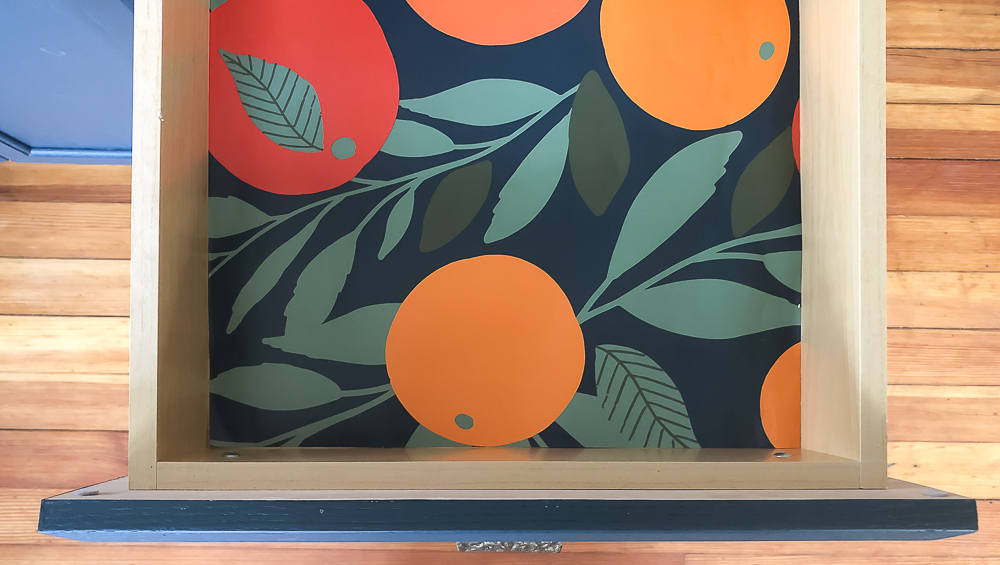
Wallpaper makes an excellent liner for drawers. It is durable and wipeable, which means it functions beautifully anywhere from a dresser to a busy bathroom cabinet. If the wallpaper liner slips around, secure the corners by activating the glue with water or add a small piece of double-sided tape. See the complete how-to here!
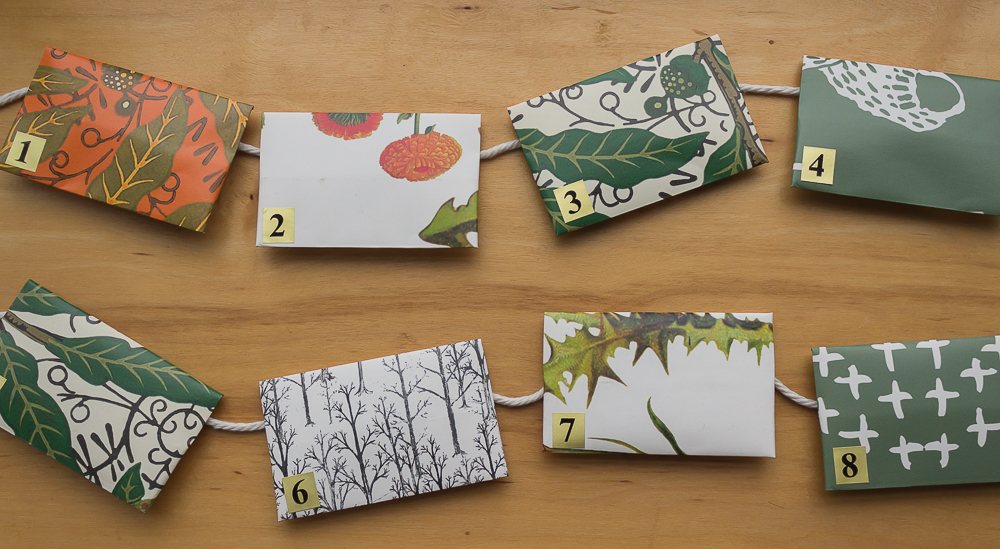
Envelope
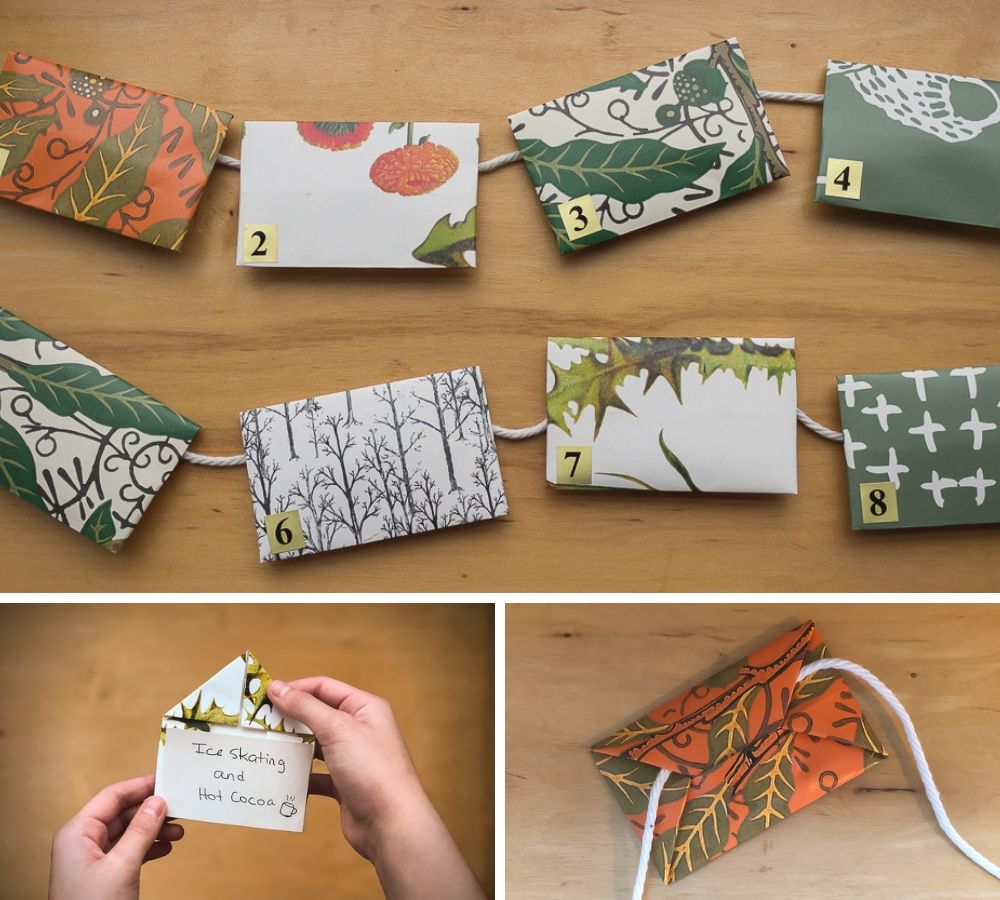
Tiny envelopes are so cute. Send a secret note or string several together for a one-of-a-kind Advent calendar or reward system. To learn how to fold an Origami envelope, follow this tutorial. Be sure to press each crease firmly.
- To string them together: Fold the top of the envelope over a piece of string and tuck in the flap according to the folding instructions. There is no need for tape.
- Add stickers or decorate as you like.
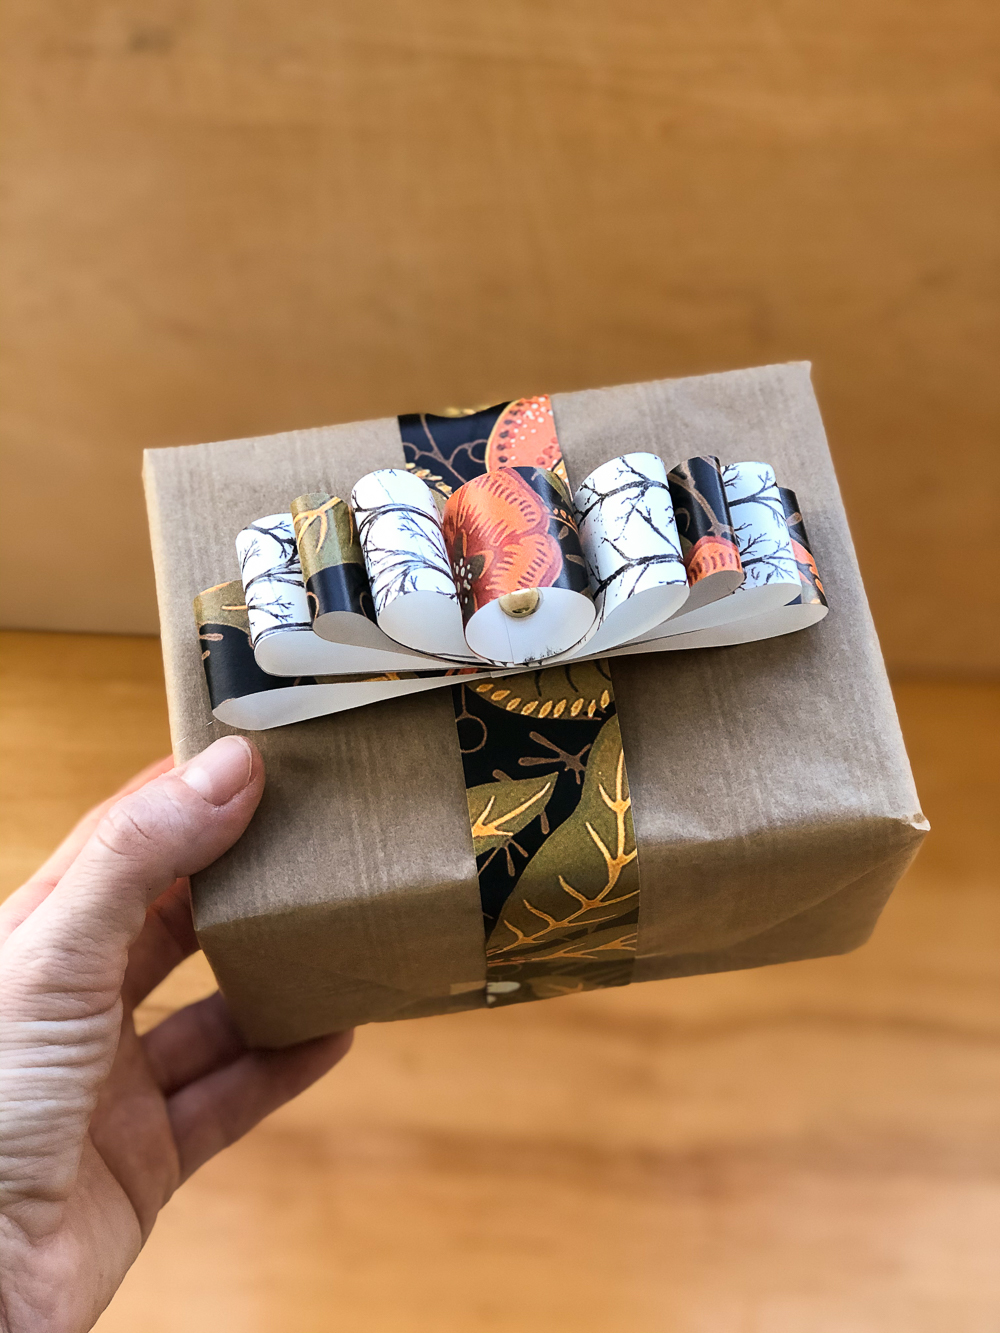
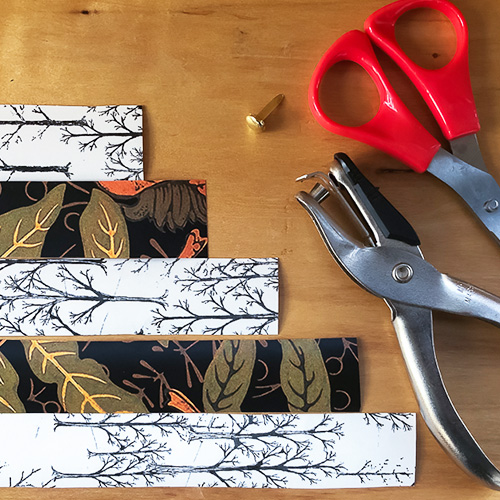
One Gift Bow Two Ways
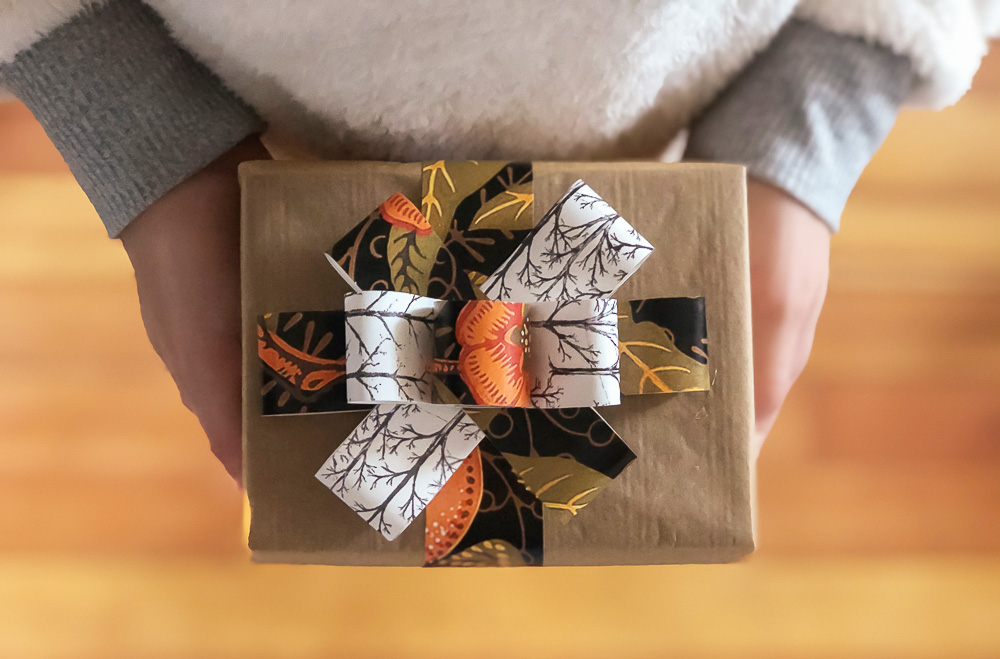
To make a gift bow, you will need the following supplies:
- Scissors
- Hole punch
- One paper fastener
- Four strips of paper 1 wide. The lengths should be 12, 11,10, and 9.
- One 6 strip for the center of the bow.
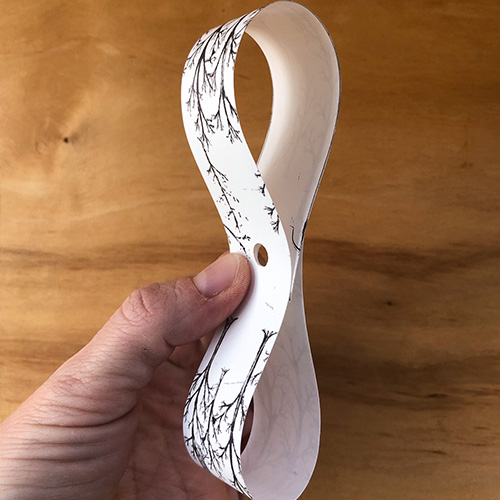
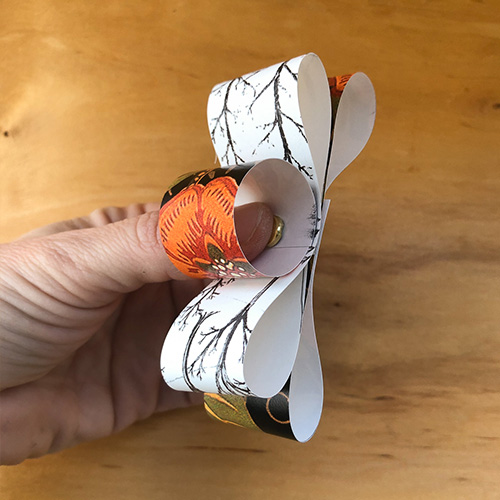
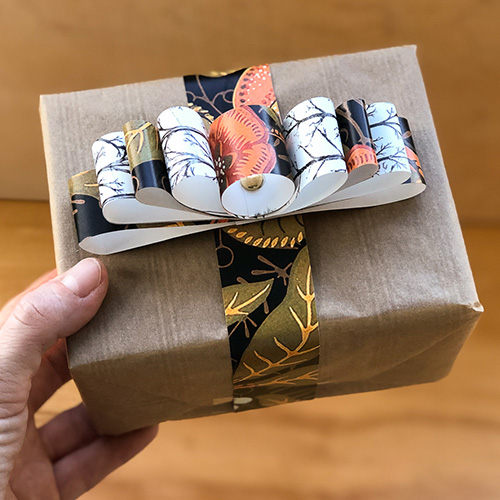
- Punch a hole at the ends of the center strip
- Punch holes at the ends of the longer strips and one in the middle.
- Overlap the edges of the center strip and place a fastener through the holes.
- Place the fastener through the center hole of the shortest strip of paper. Fold the edges under and secure them with the fastener.
- Repeat Step 4 for the remaining strips of paper. Keep the loops lined up or spread them out for a full, round bow.
Hopefully, these ideas will serve as a leaping off point for your own creativity. Leftover wallpaper is inevitable. However, using the scraps for small projects will keep perfectly usable paper out of the landfill, and that is right in line with Spoonflowers commitment to sustainability. Happy crafting!
Inspired to try out one of Stacys wallpaper projects butawallpaperrefreshisntinyourfuture?
These projects require just a $5SmoothWallpaperswatch!
About the Guest Author

Stacy Grinsfelder writes the Blake Hill House DIY blog, and she is the founder and co-host of the True Tales From Old Houses podcast. She is a lover of stories, respectful renovation, and an advocate for restoring old windows and saving old buildings. Thrifty and useful projects thrill Stacy, and she is all about creative problem-solving. Follow Stacy on Instagram at @blakehillhouse_ or on the blog BlakeHillHouse.com.