Built-In Entertainment Center
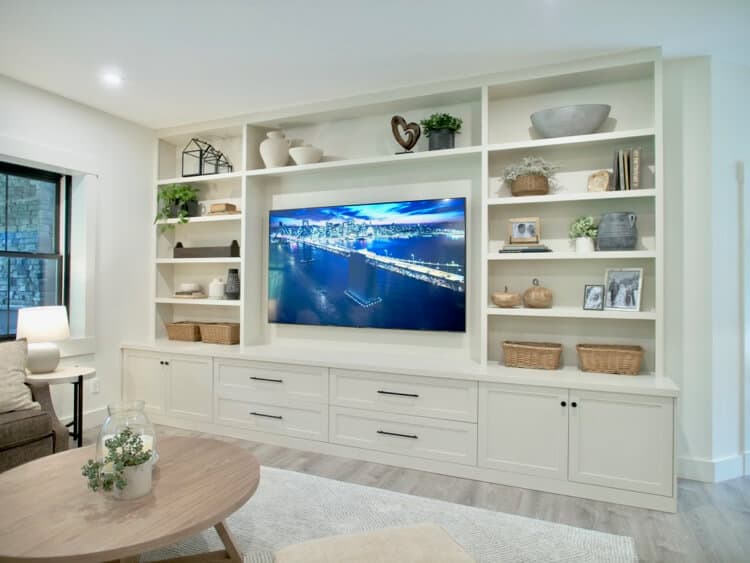
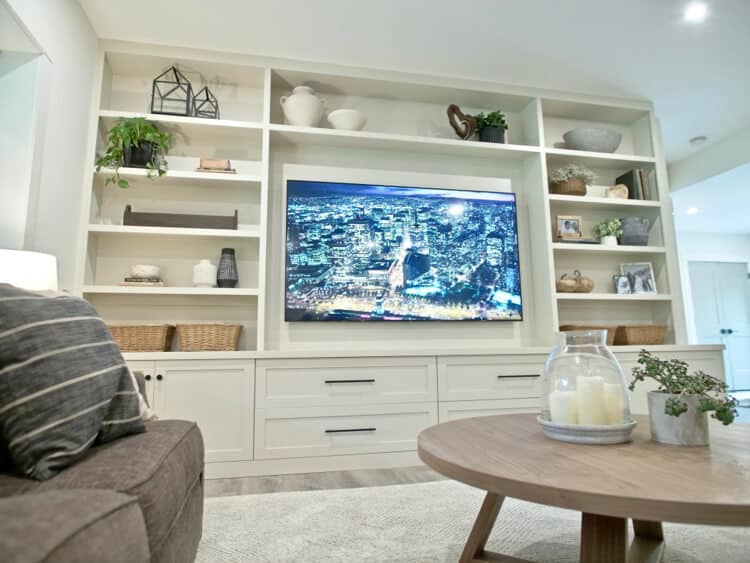
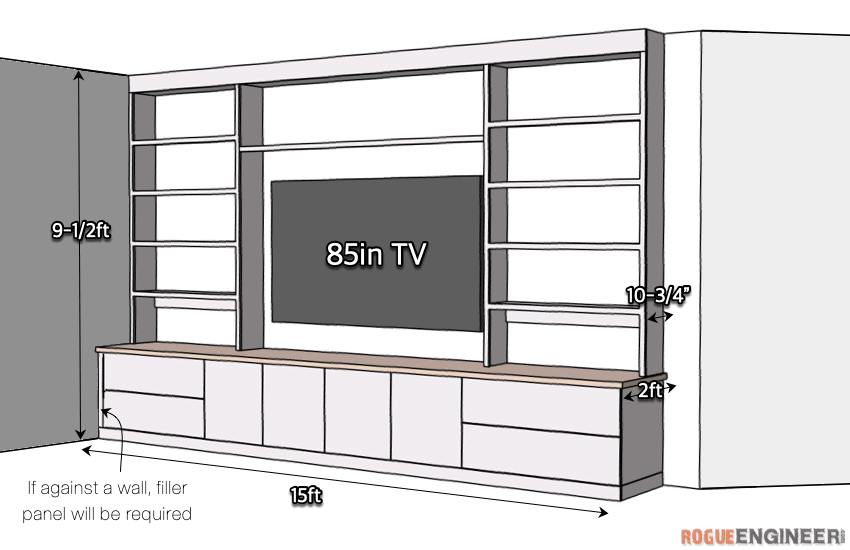
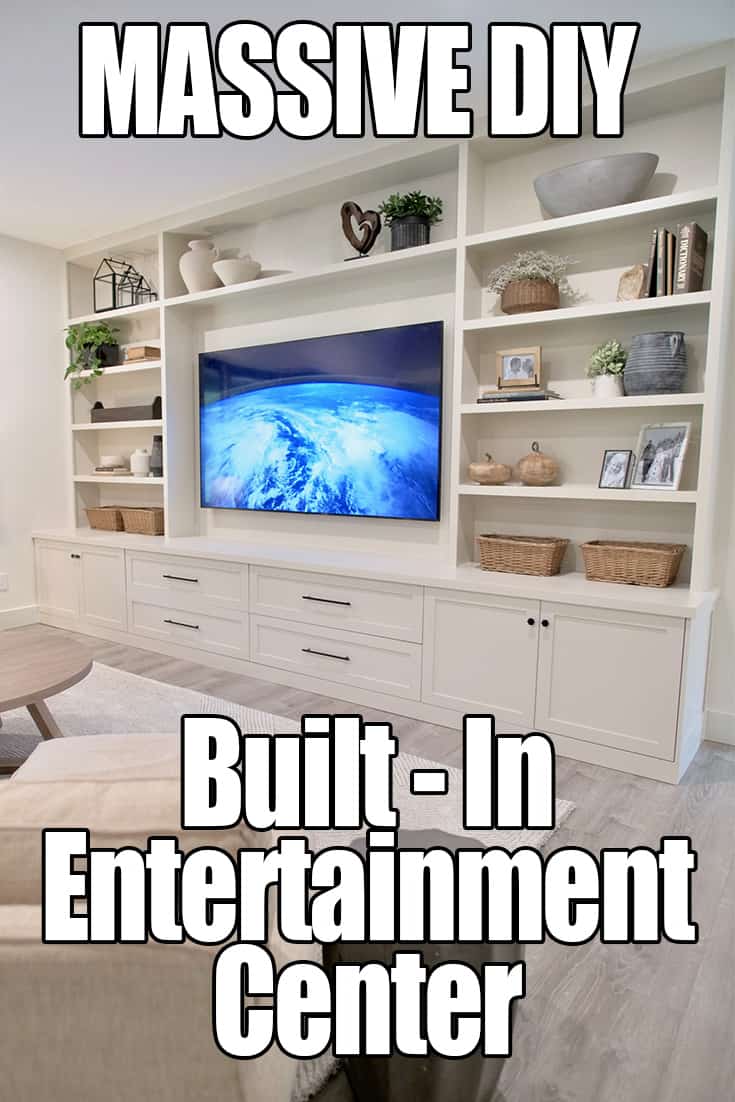
This basement living room has been something we’ve wanted to tackle for a year or so now. We finally bit the bullet and started planning out our built in entertainment center. With an 85in TV and such a large wall I knew right away that this entertainment center was going to be massive. After measuring out the space and coming up with a plan we settled on a 15 foot long unit with lower cabinets and bookcases surrounding the TV. This will end up being the perfect place to store blankets, toys and board games. Time to go get lots of plywood!
If you love this stuff as much as we do, you might want to consider following us on Instagram where we post sneak peeks and behind the scenes stuff in our stories. Also, did you know you can get tons of projects plans from all around the web when you follow us on Facebook and Pinterest!
Tools
Materials
- (5) 3/4” x 4 x 8 Pre-Finished Plywood
- (5) 3/4” x 4 x 8 Paint Grade Plywood
- (6) 2 x 4 x 8’ Lumber (or three 16’)
- (4) 22” Drawer Slides
- Edge Banding
- 3” Wood Screws
- 1-1/4” Brad Nails
- 1-1/4” Pocket Screws
- 2-1/2” Pocket Screws
- 1-1/4” Trim Head Screws
- Wood Glue
- DAP Extreme Stretch Sealant
- DAP Premium Wood Filler
- Cabinet Doors/Drawer Fronts/End Panel(s)
- Door/Drawer Hardware
Disclosure: The links provided in the “materials” and “required tools” sections are affiliate links. If you would like to support our site and help keep our content free come find out more about how we can make money with no extra cost to you.
Dimensions
How to Build a Large Built-In Entertainment Center
Time needed: 10 days.
-
Cut List
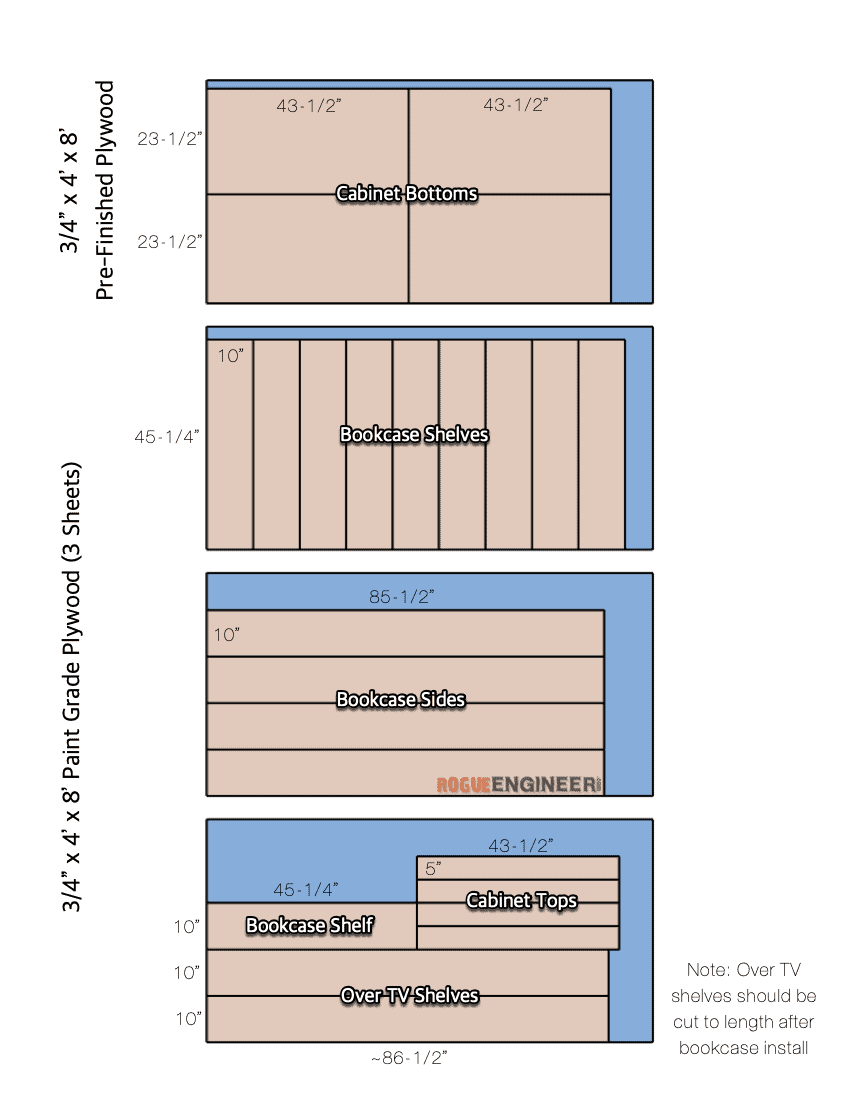
Note that some of these pieces will need to be cut to fit in a later step. This should be used as a guide for how to layout your cuts.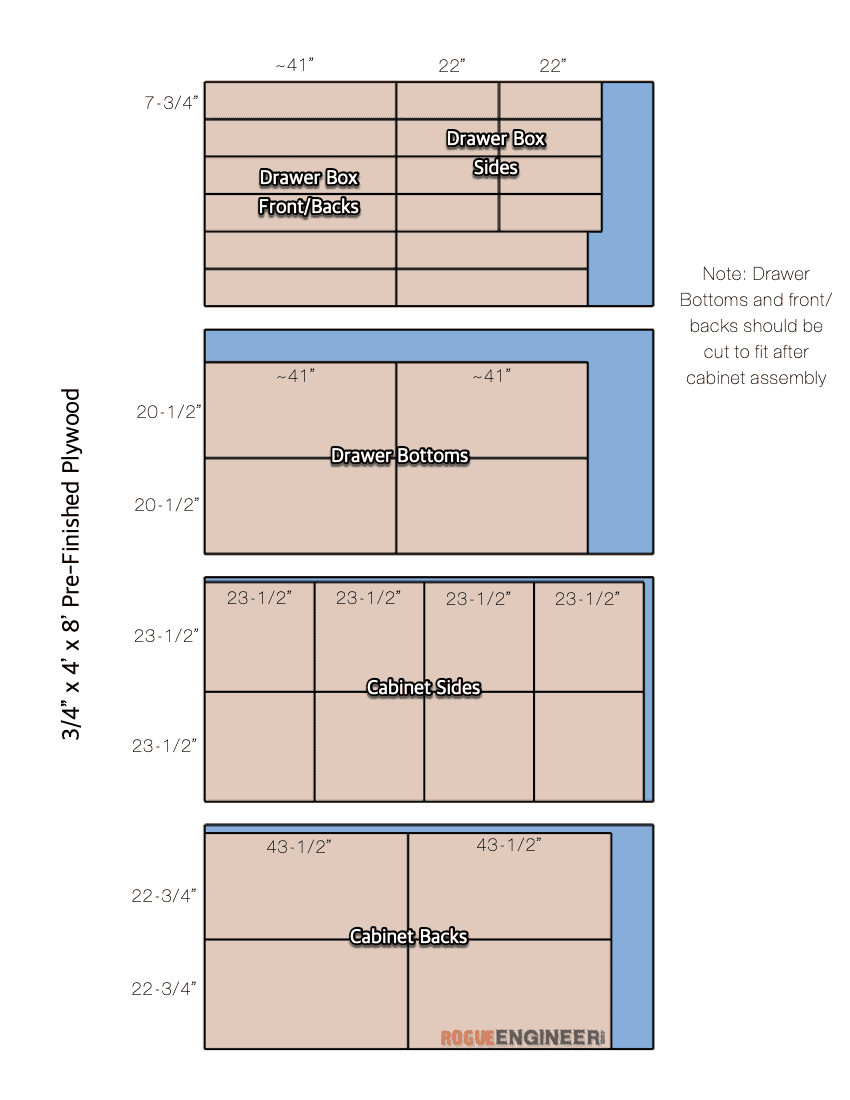
-
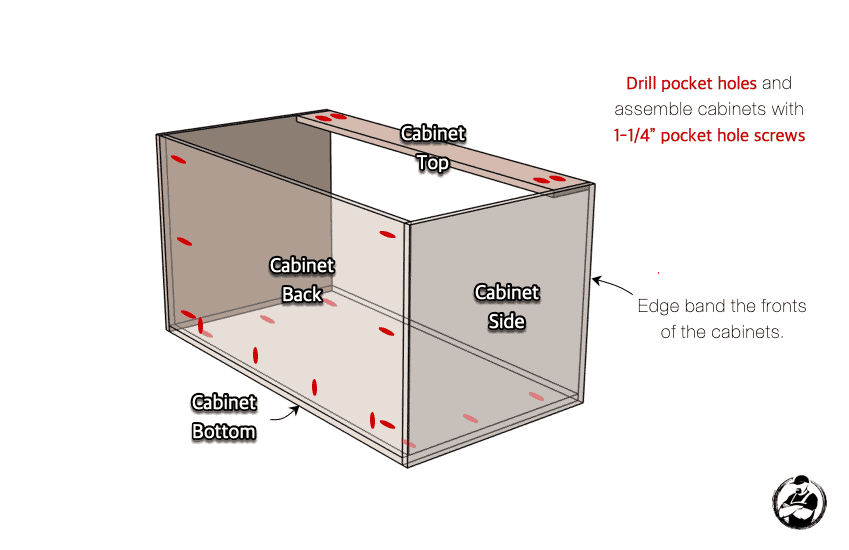
Assembling the Cabinet Carcasses
-
Assembling the Drawer Boxes
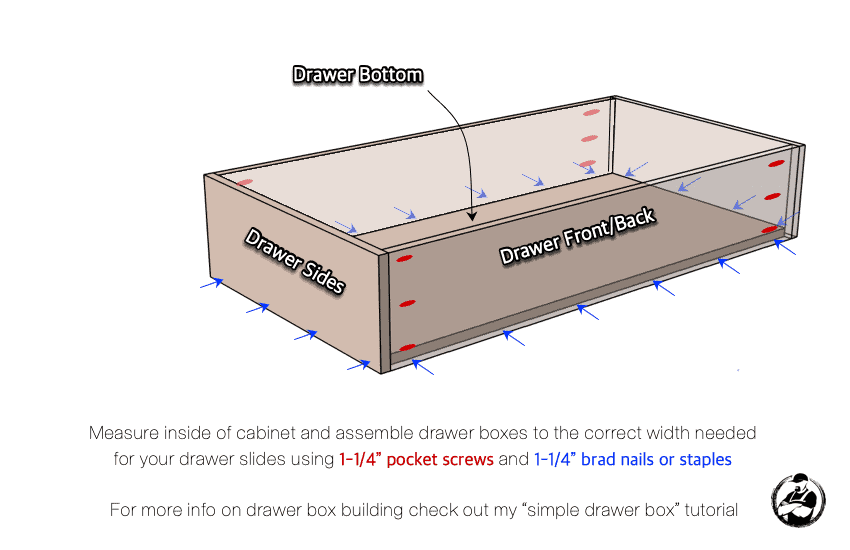
Click here for the full tutorial on how to build a simple drawer box. -
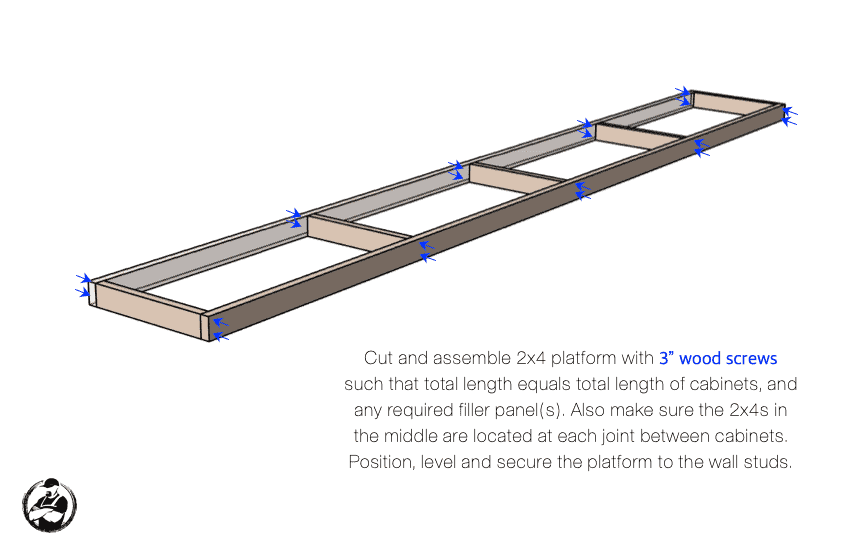
Assembling the Platform
-
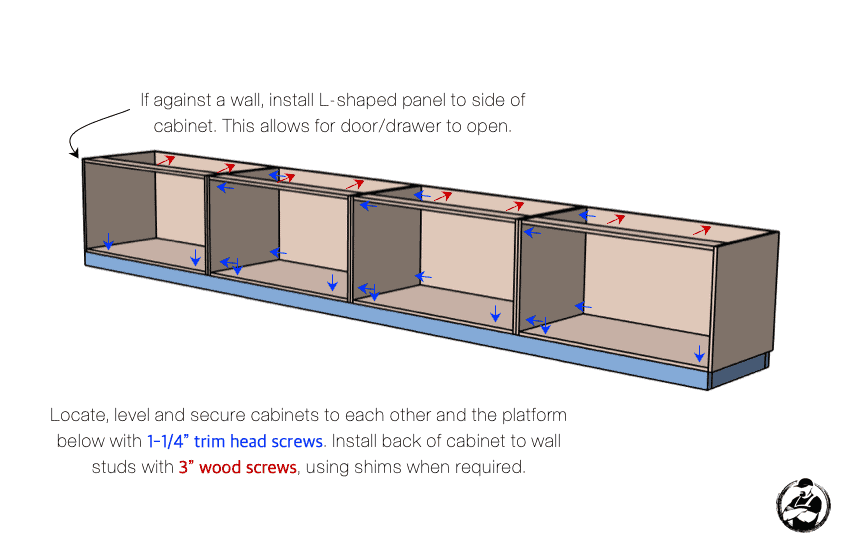
Installing the Cabinets
-
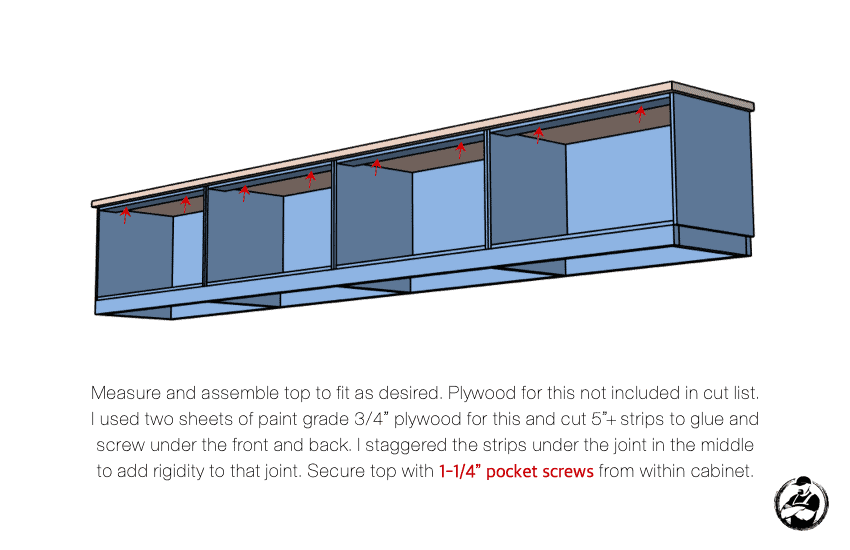
Installing the Top
-
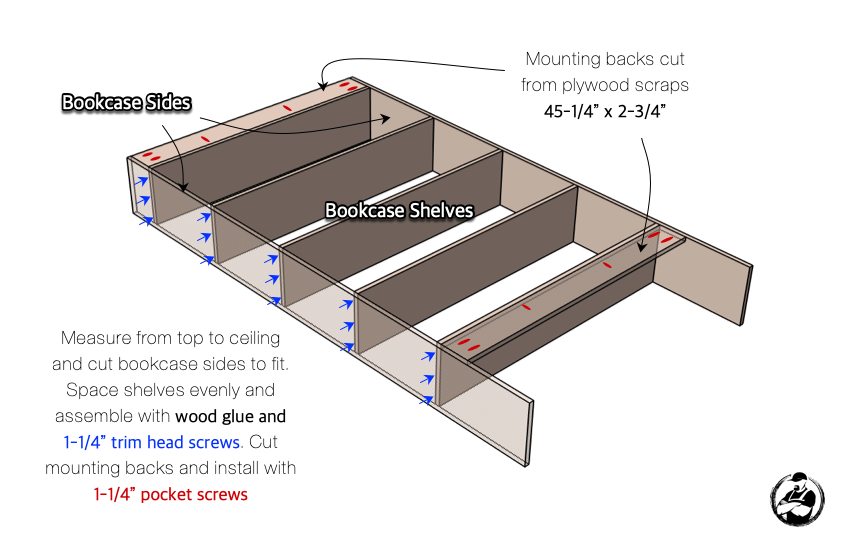
Assembling the Bookshelves
-
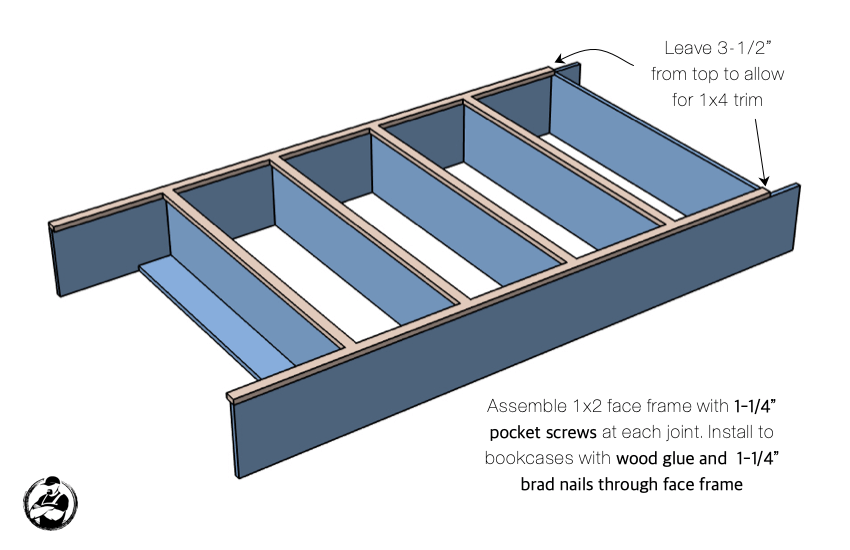
Installing the Face Frames
-
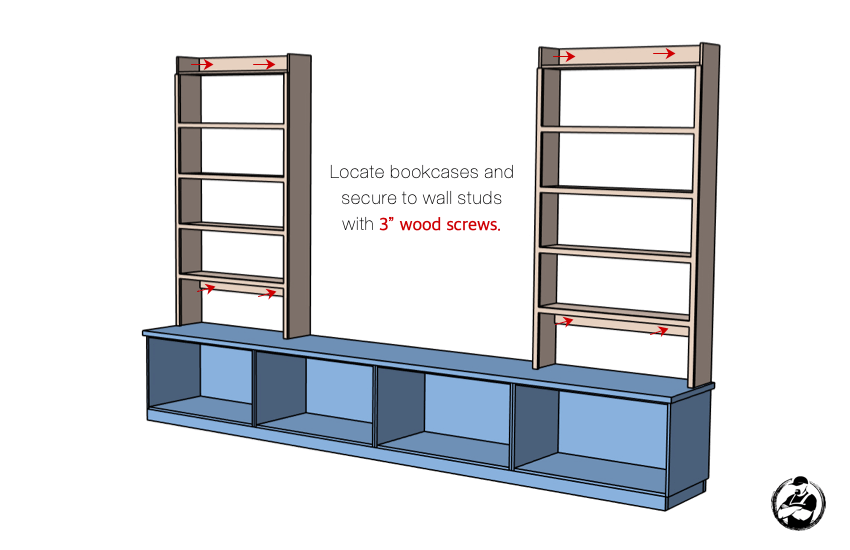
Installing the Bookcases
-
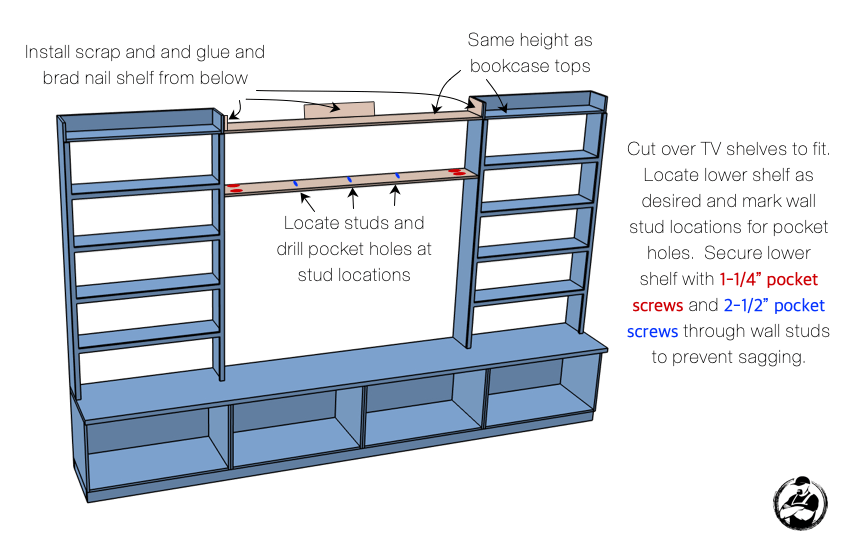
Installing the Shelf Over the TV
-
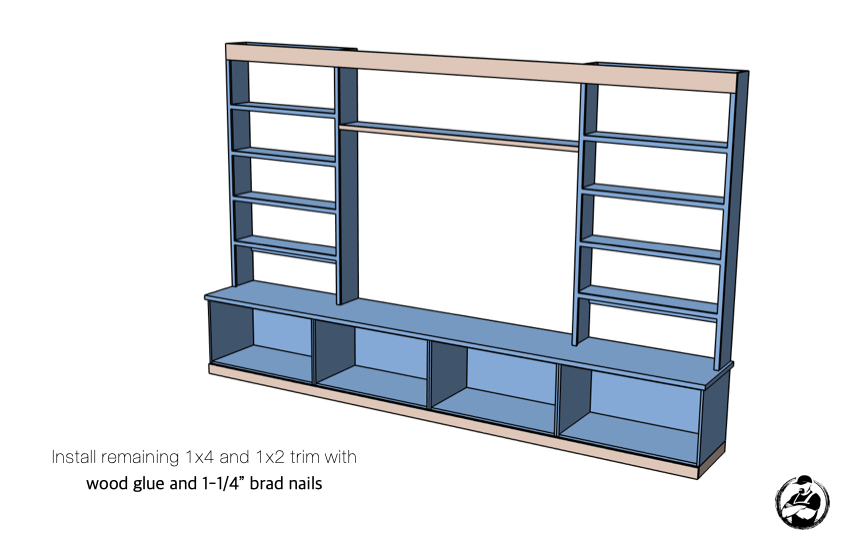
Adding Trim to the Unit
-
Prepping for Finish
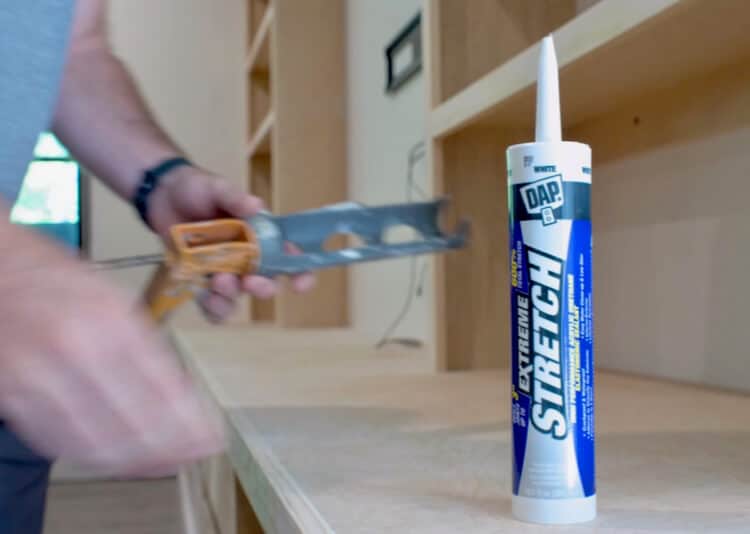
Making sure that a project like this turns out as good as it can, and continues to look that way for years to come, really comes down to prepping the surfaces for paint. We started by sanding all the surfaces up to 220 grit for a smooth finish. Then, we applied DAP Extreme Stretch Sealant to seal the back of the unit and the trim into the wall. This is great because it can fill gaps up to 3 inches wide (using backer rod when joint depth exceeds 1/2″) and it can stretch up to 600% which is perfect making sure that the seasonal wood movement doesn’t end up cracking the caulk lines.
We also used DAP Premium Wood Filler for any wood joints and nail holes. This product won’t shrink or crack and is great for filling even the wood grain that might show up on a painted surface.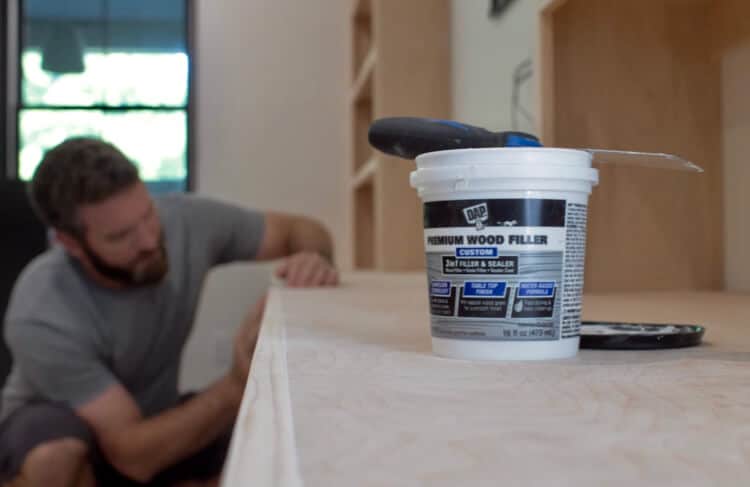

-
Priming & Painting
With all the wood joints and caulking, we deciding to paint this unit in place which will make sure we have great coverage. To do so we taped and shielded the walls, floor and ceiling before spraying the entire unit and wall behind it with primer and paint. For the paint we settled on Natural Cream in color and Benjamin Moore’s Advance interior paint which will provide a more durable finish.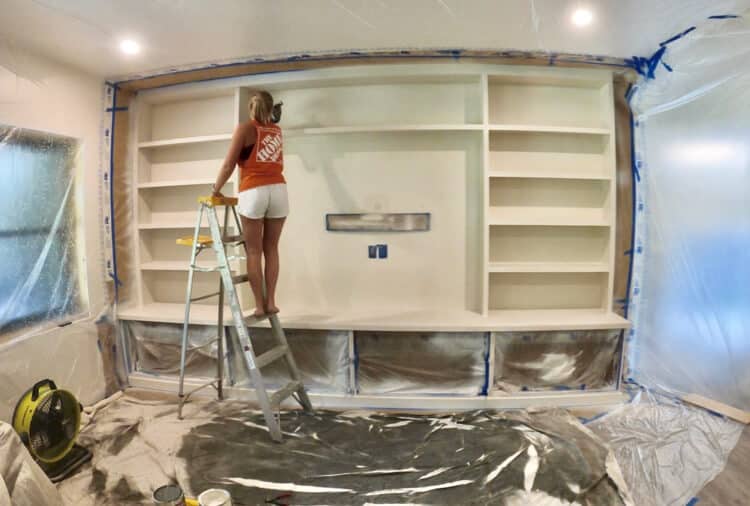
-
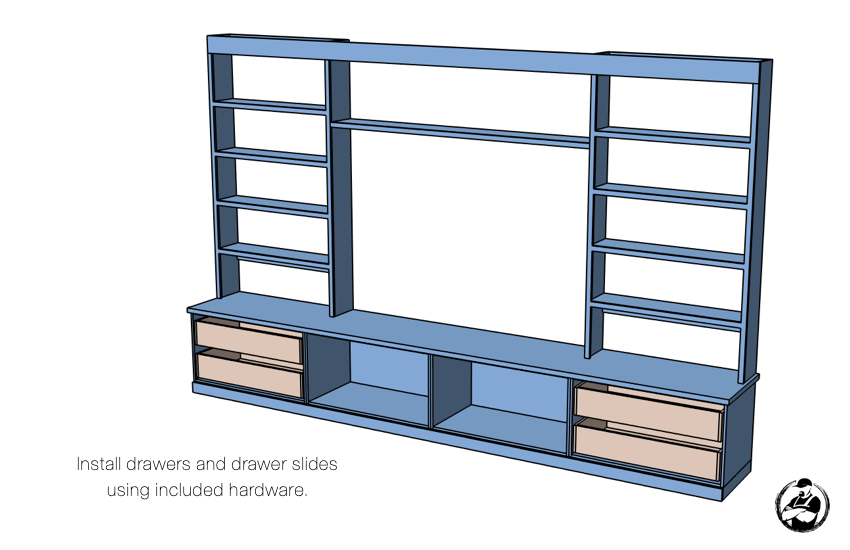
Installing the Drawer Boxes
-
Installing the Cabinet Doors/Side Panels

Related Tutorials:
Installing Concealed Cabinet Door Hinges
Making Cabinet Doors with a Router Table
Making Cabinet End Panels
Painting and Installing Cabinet Doors
Making a Cabinet Door Drying Rack
Hopefully these plans helped you have the confidence to tackle a project like this. If you have any questions or input please comment below. Make sure to show off your builds in the comments as well for others to enjoy!
Continue reading at Built-In Entertainment Center.
