
Jess’ DIY Bench 2.0 – Her Solution To Her Ugly Electronics (Plus An Ask The Audience)

Les and Jess are at it again. For those who don’t know, Les is my dad and the carpenter hero to 99% of my room designs (the bench here, the banquette and counter here, and peg rail here). We’ve been building things together for as long as I can remember, and while it’s not always smooth sailing (you could say the apple doesn’t fall far from the stubborn tree), they are by far some of my favorite memories. ANYWAY, when I was starting to design my current living room, I knew there had to be a custom “Bunge Bench TM”. It’s the law. Again if you are newish here, this is the wrap-around bench I designed for my last apartment that was perfectly built by DIY DAD, Lester Bunge.

Not only did I love it with all my heart, but y’all were also pretty into it too which made it even more special. Unfortunately, there wasn’t a spot for it in my new place so it now lives at my dad’s which feels right given that he built it. So aside from the fact that it wouldn’t have fit, I also needed a bench that was more of a cabinet and here’s why…

AHHHHH. MY EYES. I get extremely bummed out when I have to see lots of electronics and cords. I know I’m not alone in this so I wanted to come up with a pretty way to only see them when necessary. Is a cabinet bench a new idea? No. But finding one that met all of my measurement, style, and potential financial limitations was going to be ummm…impossible? I should also mention that my living has only two outlets meaning I had only two spots where these technological terrors could live. One being on the wall you see above and the other on the wall under my non-turret window which you will see in a sec. A cabinet bench just made the most sense.

Now, let’s revisit my “office” for a minute. I am so happy with how it turned out. I think it balances bold and soft, earthy and luxe, and classic and modern. Those were my main goals and my biggest stresses:) I want to continue that through the space, bringing in rich colors, patterns, and materials.

So here is where this “cool” electronics storage cabinet bench will live. I love the idea of some extra seating (I need to get a cushion made so that will be new for me), I love that the outlet will be covered, and of course, I love that my electronics will be tucked away nicely. But what will it look like???
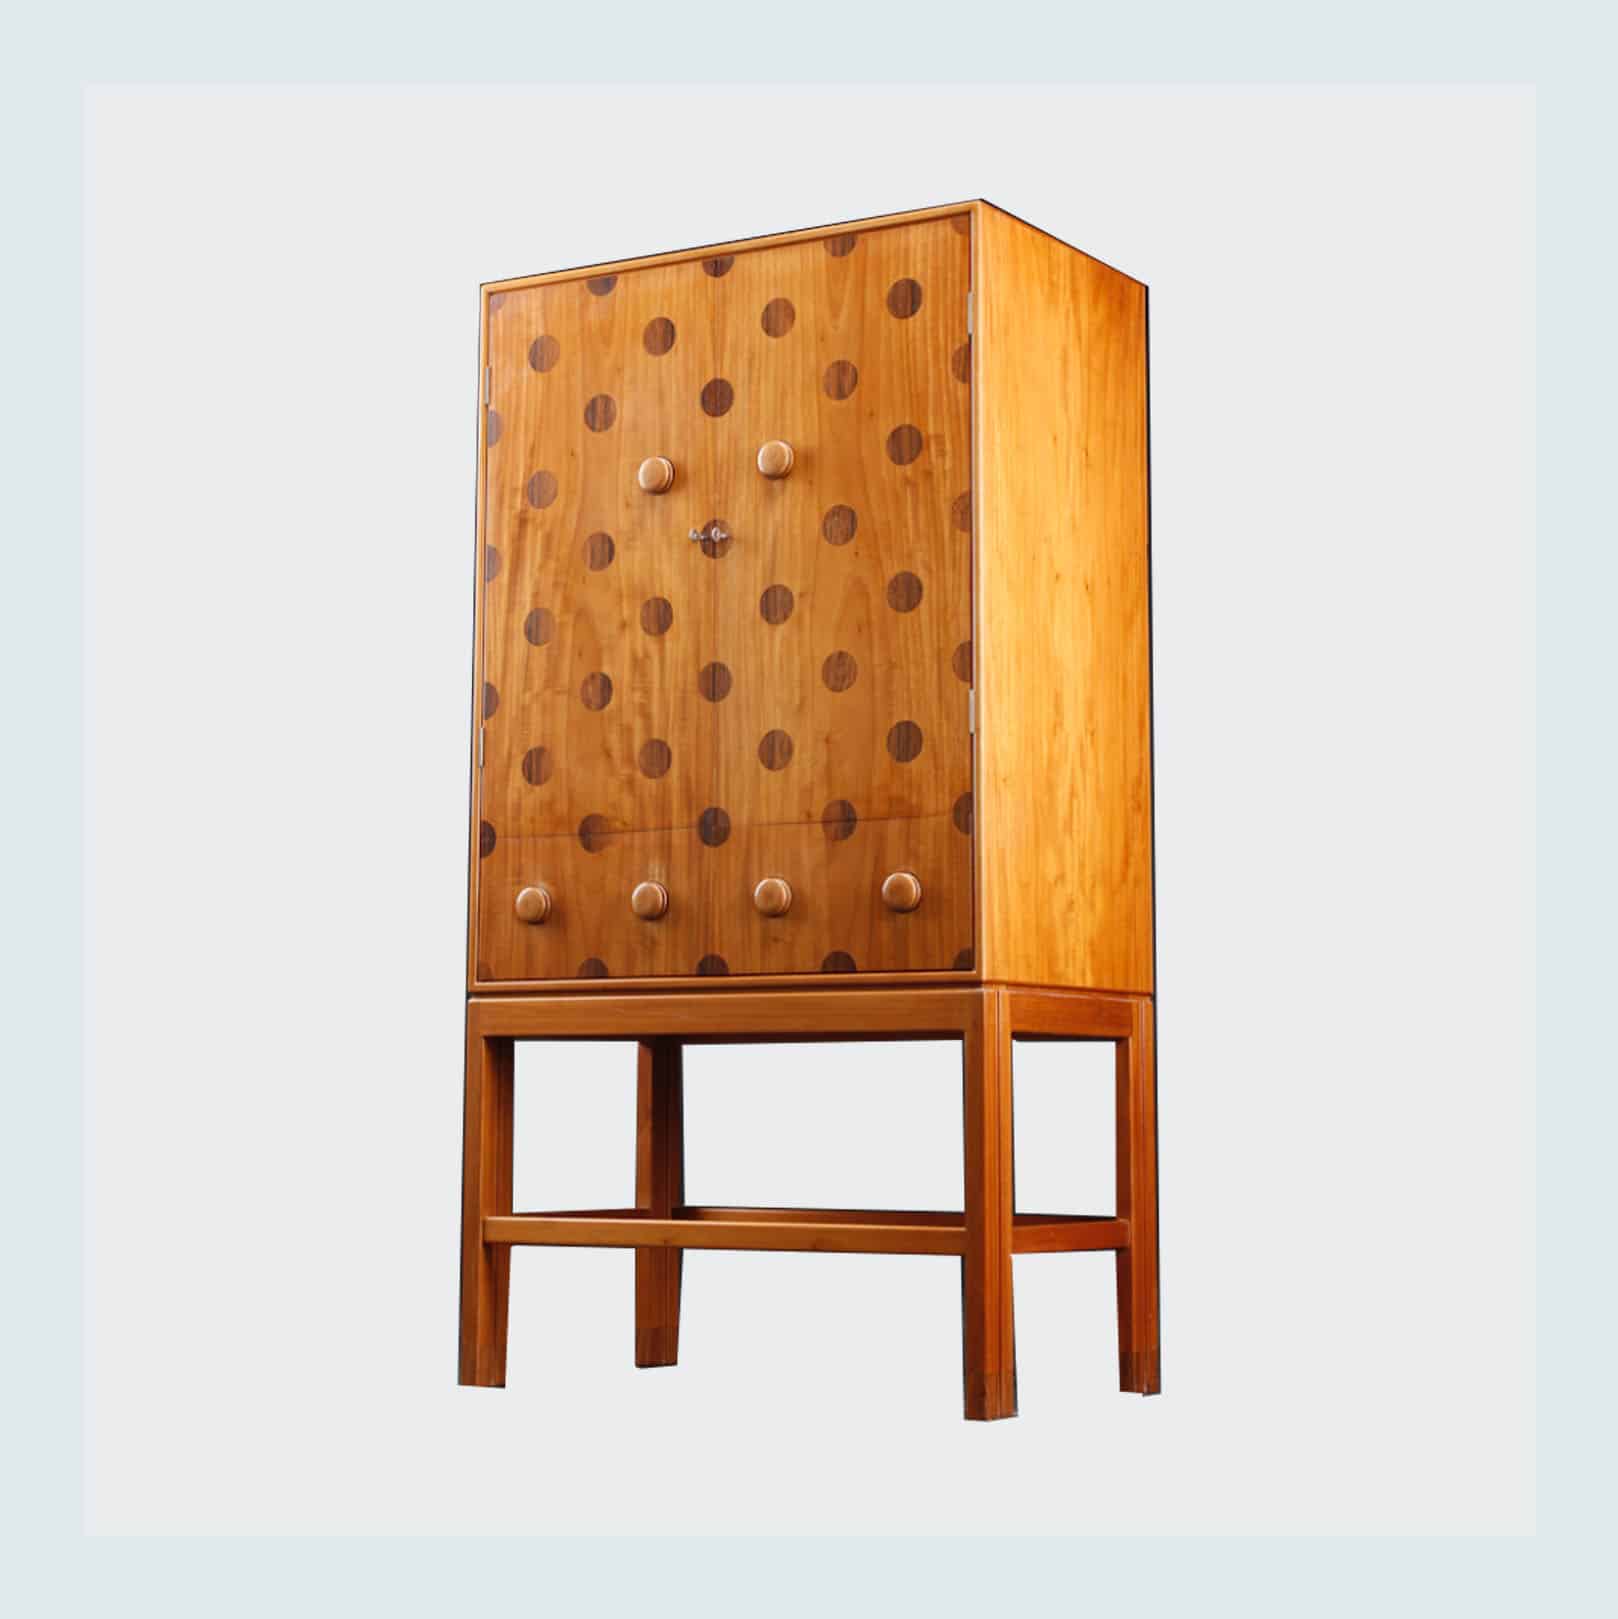
If you read this post about what we would buy if money were no object then you know this $52,000 Gustav BertelsenIf cabinet made in 1946 is at the top of my list. Y’all, there are only two known to have been made. I’ve never really been a polka dot gal but I do love circles so this speaks to the deepest parts of my design-loving soul. What I decided I am going to do (or try to do) is make my own highly-inspired version since I’m short about $52,000. And when I say “I make” I mean “me and my dad make”. I called him up, sent him a VERY basic drawing, the requested measurements, and we were off.

I would like to mention now that this is very much a process post as this is as far as we’ve gotten. My dad built the frame, leaving me to cut the doors, and finish sanding everything…about two months ago. Between being nervous I would mess it up (wood still isn’t cheap) and laziness, I did not do what he asked. Luckily, I conned him into visiting me two weeks ago where we finally did those things.

This notch is for the power strip to my computer and lamp. That was my dad’s idea which is why we make a great team. I’m more form and he’s more function.
But now let’s talk stains and how I plan to make those perfect circles…

This was the stain I picked that I thought looked closet to the original cabinet…Varathane in Colonial-Maple. I think it’s too orange. Since the original wood was mahogany maybe their Golden Mahogany color will look better?? Any thoughts? I want it to be warm-toned to bring more warmth into the room but this doesn’t feel right yet. Also, I am planning on adding a sheen so that might change the look a little as well. Then we have the circles…
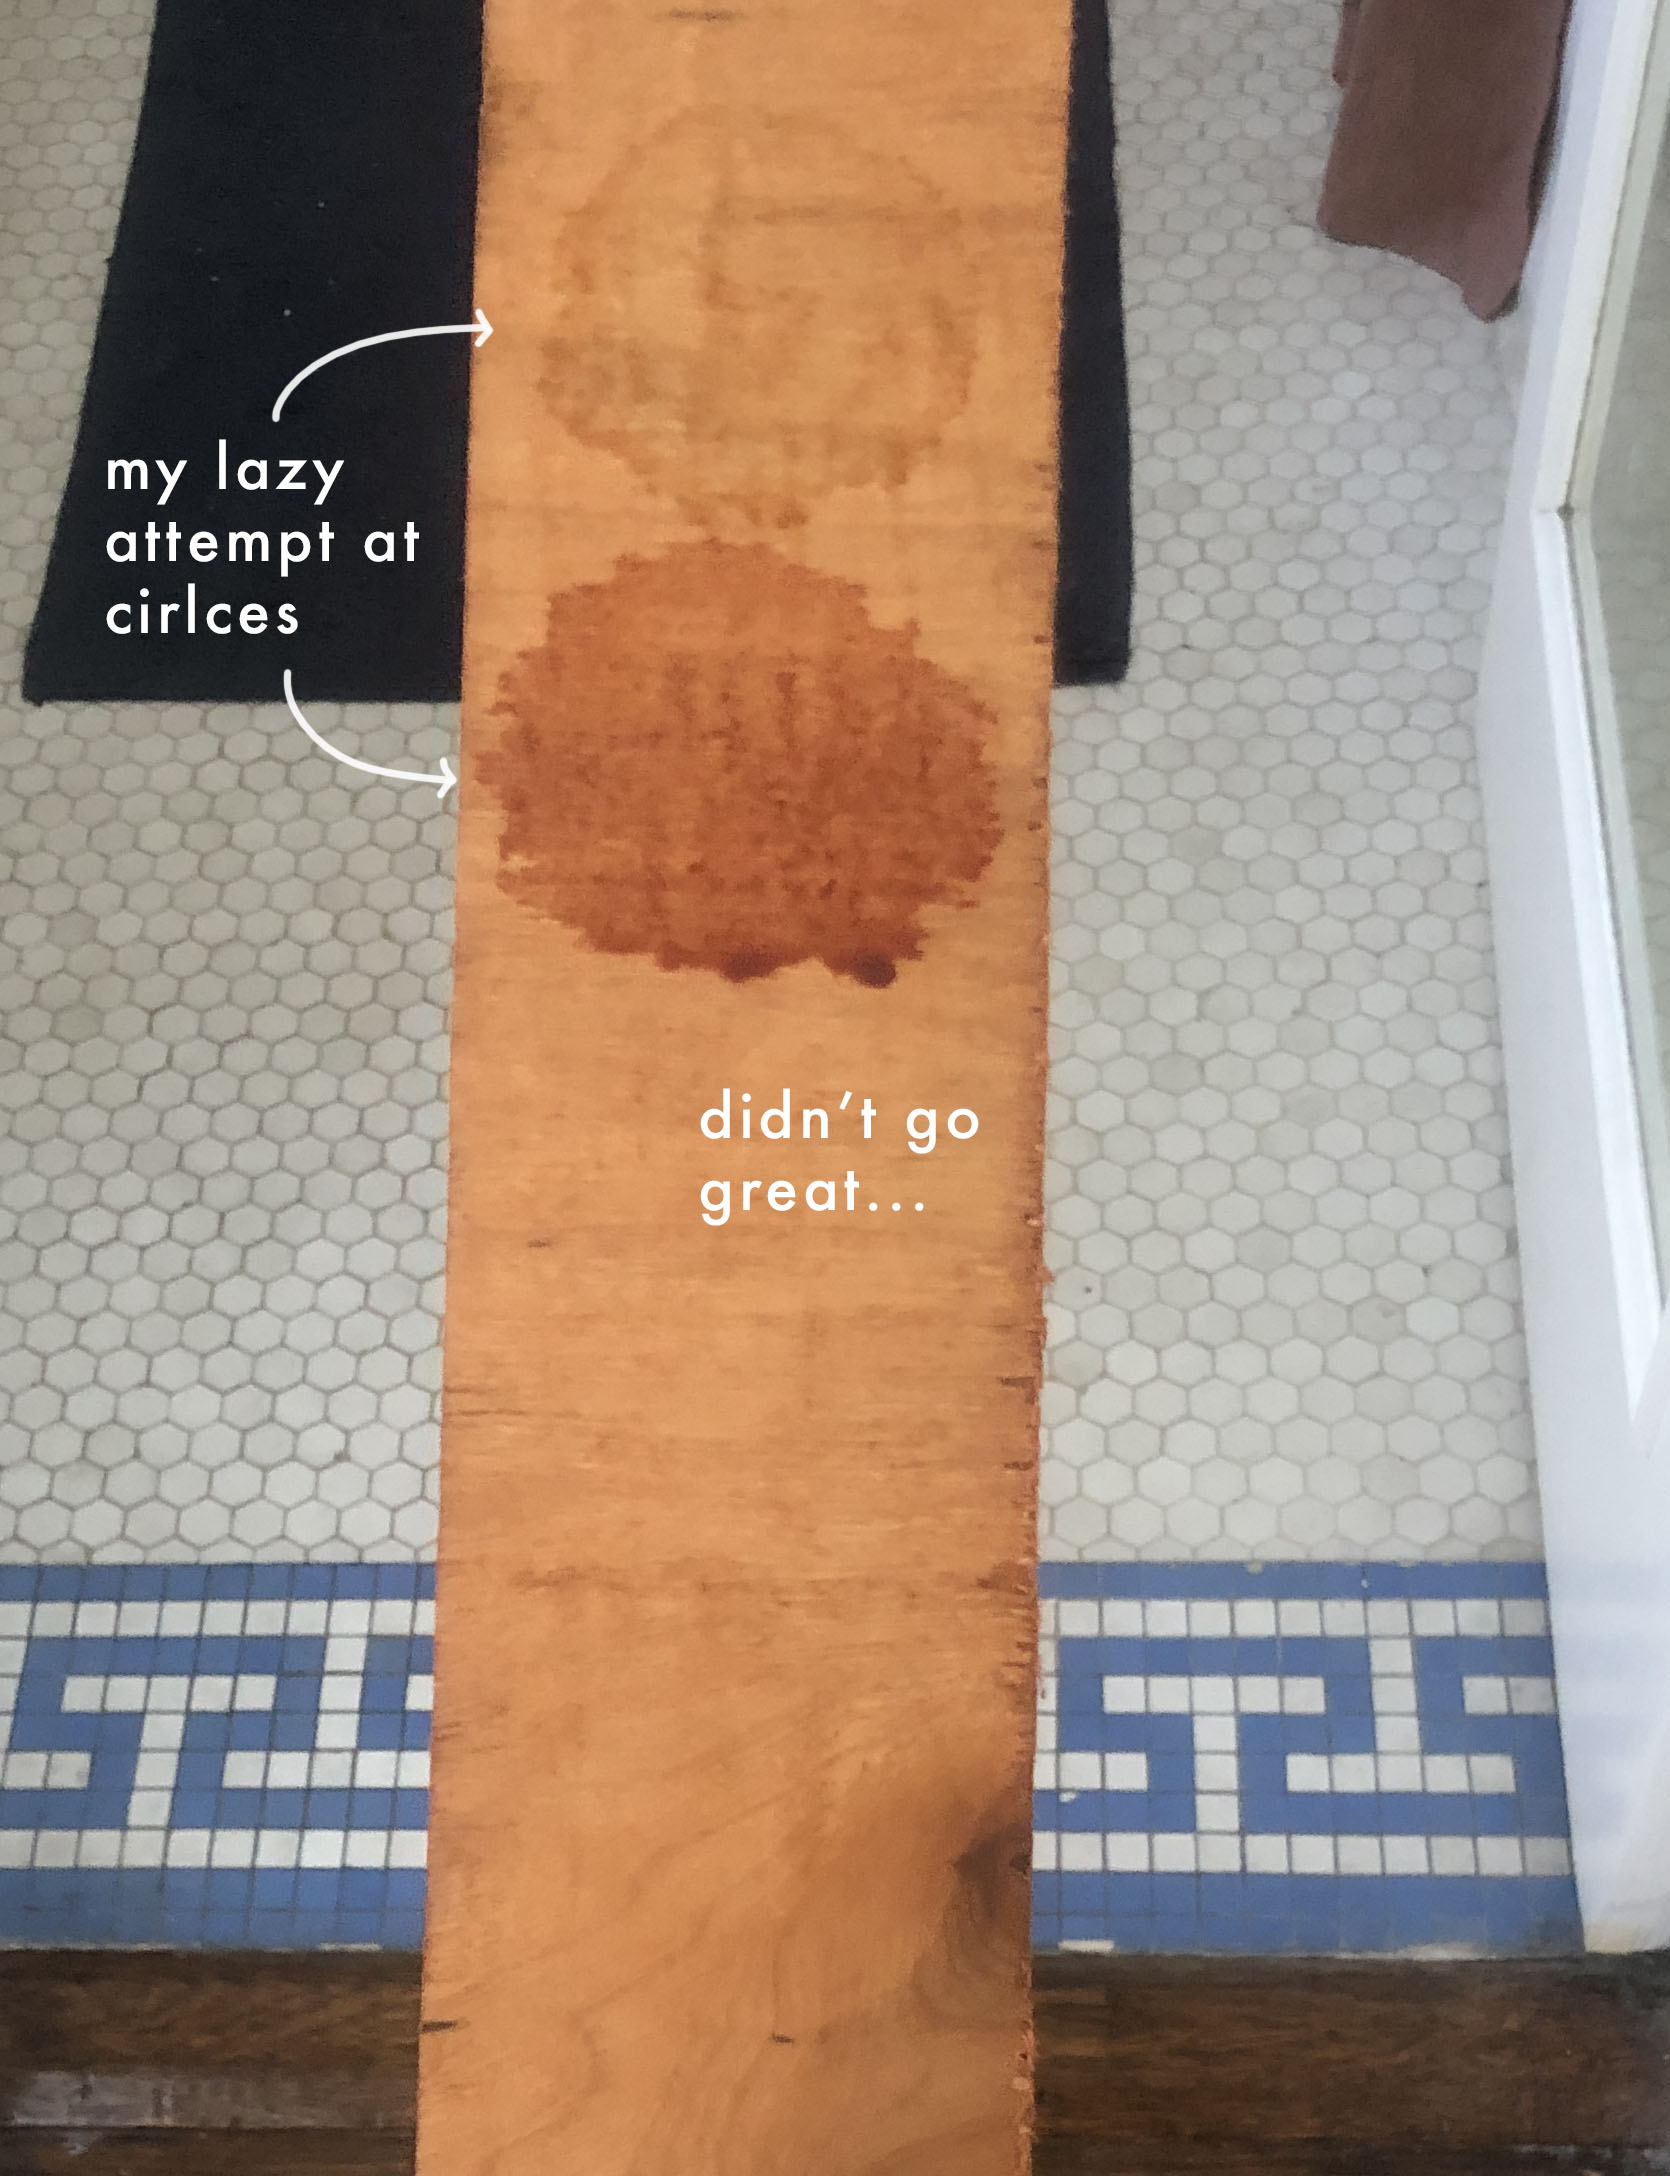
Hahahah. First off, the base stain was mostly dry but not 100%. Second, I haphazardly used a sponge brush to make those “circles”. The original plan, that my dad came up with and got made, was to use a custom vinyl stencil that had circle cutouts. Unfortunately, the circles were way too spaced out and the type of vinyl the company chose was waaaay too sticky. I was afraid it was going to mess up the wood. Dad agreed. Then as we were troubleshooting ideas I had a potentially great one. I could get a custom iron brand made! That way the circles would be perfect, dark, and I could even stain them if need be with a far less chance of any bleeding outside of the circle, right? Etsy has a ton of affordable iron brands so I don’t think it’s going to be too expensive to get made…I hope.
But PLEASE! If you have any ideas, experience, and/or tips for any part of the staining and potential branding process I am all ears! This is my first time doing this and I want it to look good. DIYs are too time and money-consuming for them to come out bad!
The next big decision that I’m figuring out is hardware.


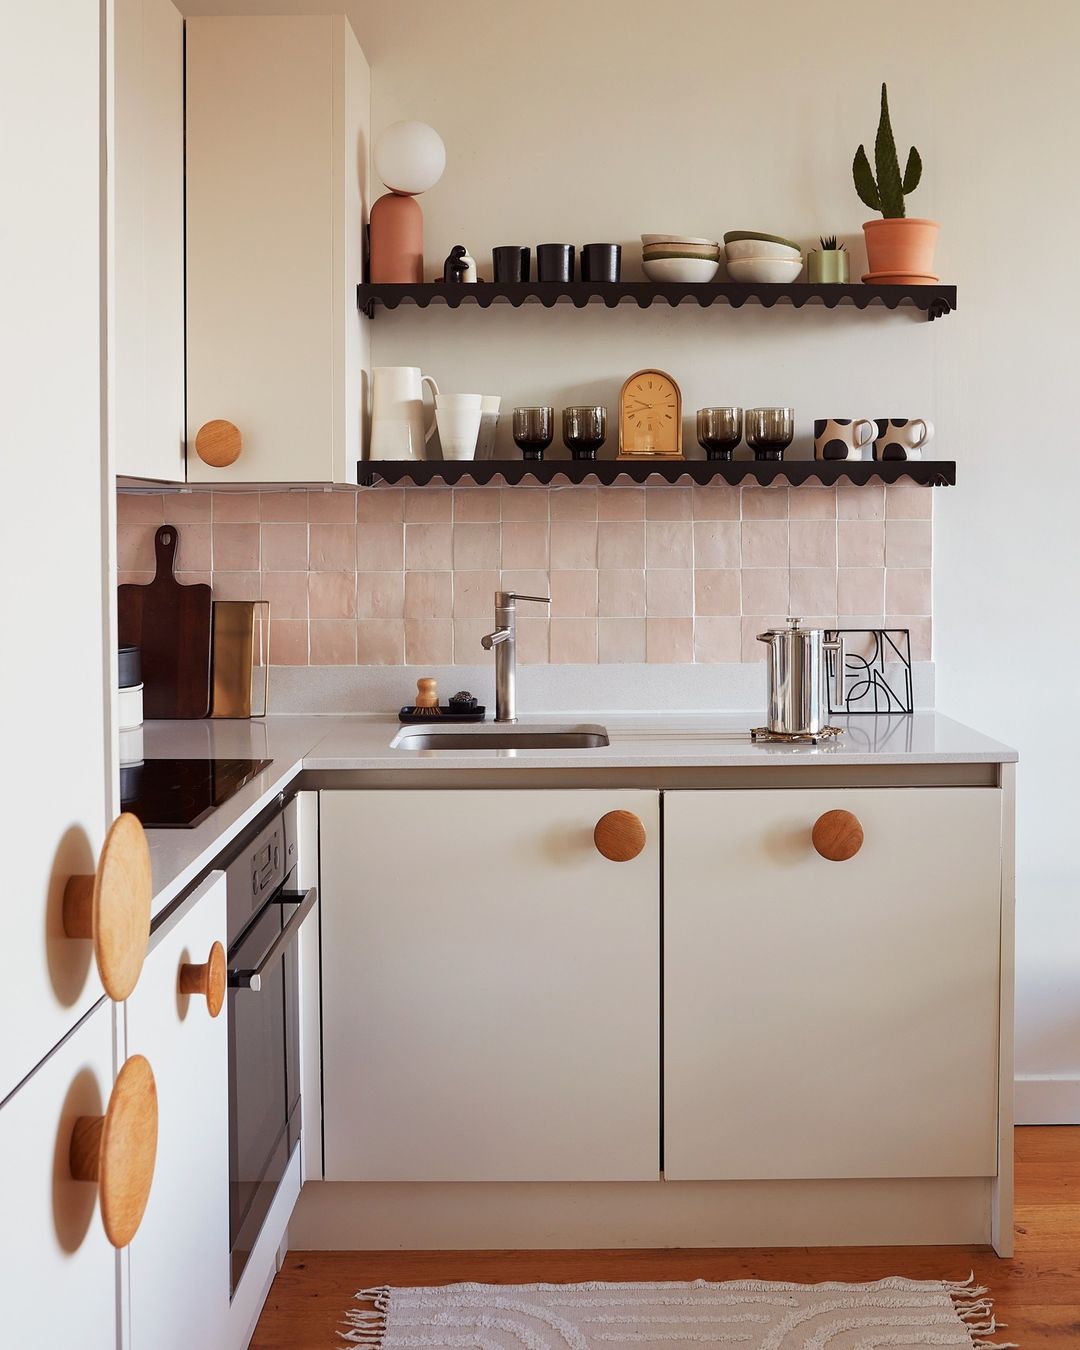
Aside from the shape and structure of the cabinet, hardware is where I will likely diverge from the original piece. Originally, I thought I would do a version of the large circle maybe wood, maybe not, but I really love the look of these micro knobs that DISC Interiors made for this incredible nightstand. I can’t get enough of the entire design. Using a knob similar to this could lean into that balance I was talking about earlier since that pattern is so big and bold.


Then there’s this incredible piece by Hachi Collections. I love those medium chunk brass knobs! Plus they add an additional layer of “custom” with how they are inset in the wood. But then…
…I look at these big wood knobs and think maybe I should just do something like that. I know it will totally work (and are probably cheaper).


Then there’s the option to still do a larger circle but mix it up. I couple go for a more modern look with something like the black ones on the left OR try and find a sick two-toned option like the ones on the right.

I just stuck this photo in here because I love those handles so much and has me thinking outside the box. Not sure what will come of it but it’s fun to think about.


My last hardware idea is no hardware at all! OOF I love these double finger holes by Atelier Steve. So simple, so special, and so affordable.
So as I think about the hardware I need to think about hardware placement too. I thought it would be fun to talk through where I started with the door design, where I ended up (which you already saw earlier), and the hardware placement options I’m considering.

This was my initial plan. Two inset doors that swing out from the center with two knobs. I liked the simplicity of it since the circles were going to be visually very powerful. But in the final hour, as my dad was cutting the doors, I made a different decision…
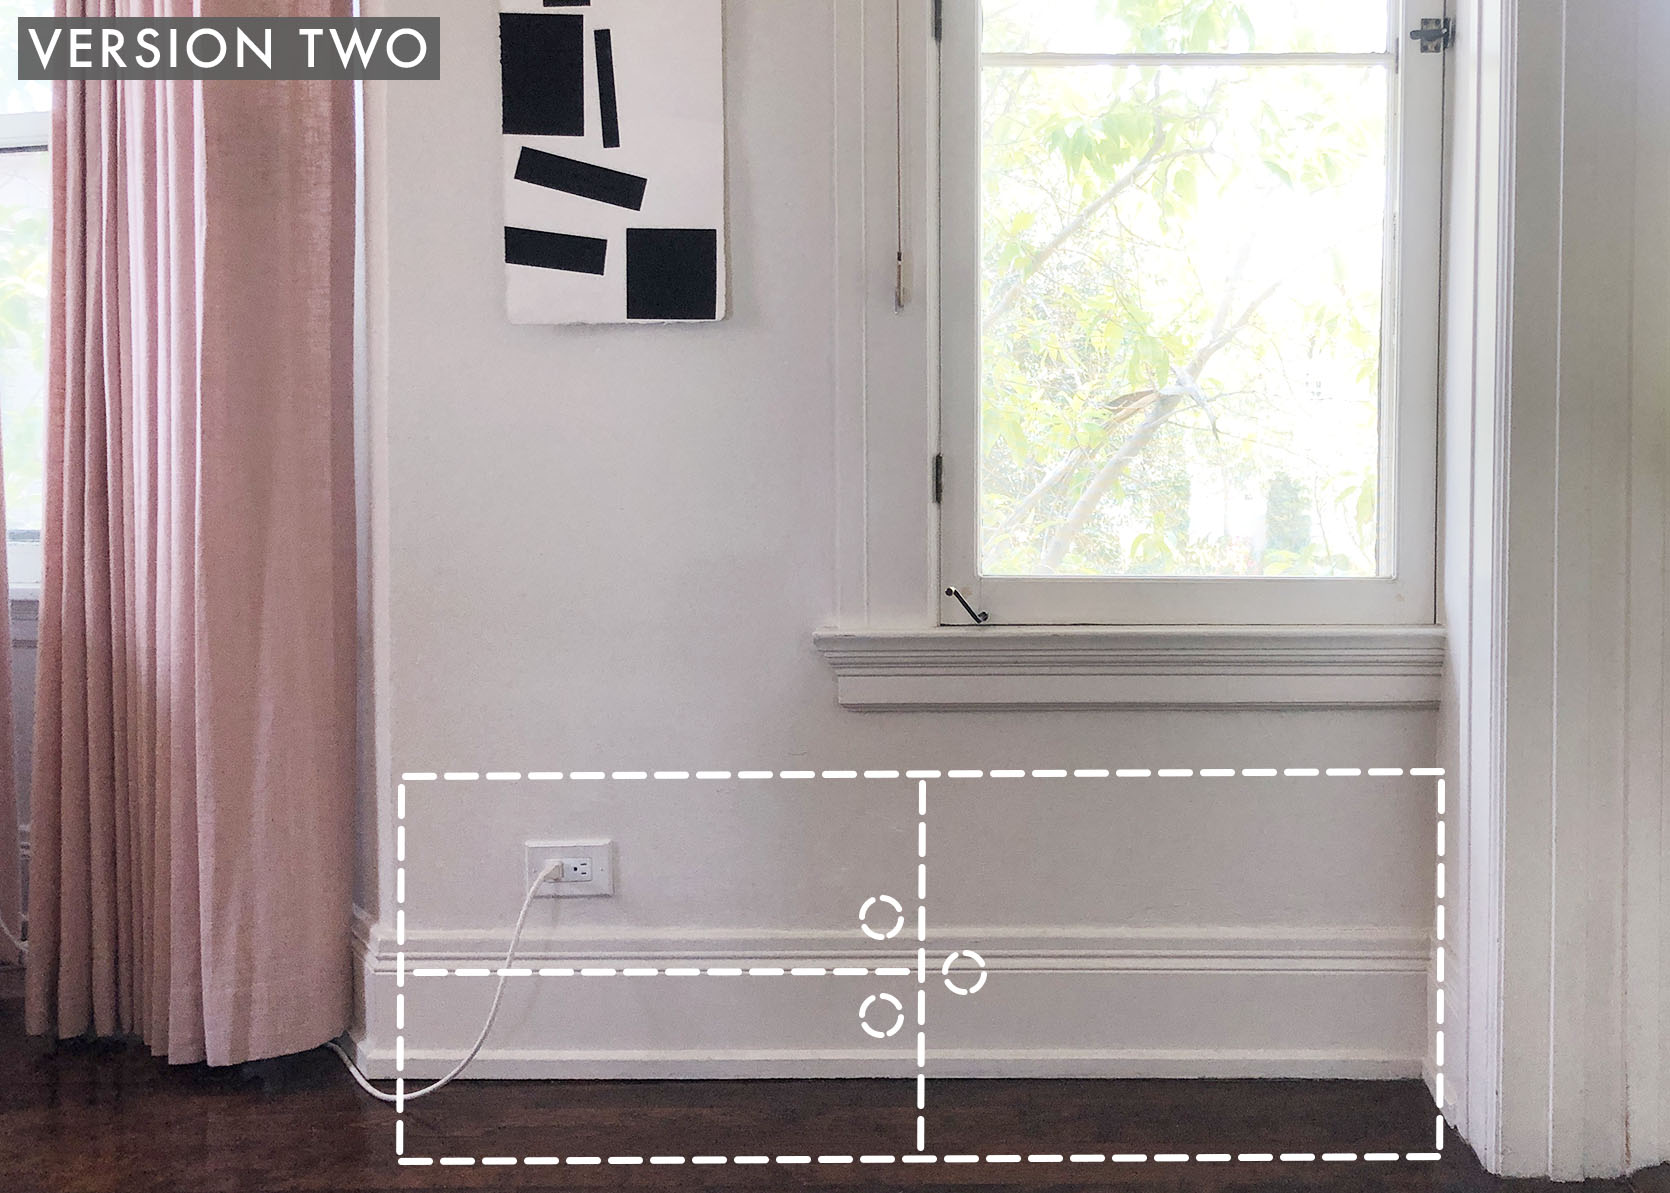

TADA! Three inset doors. I thought, “let’s take this up a notch!” So I had my dad cut one of the doors in half, horizontally. We even added a shelf (that was his idea, I think) so that there was an actual reason for the two skinny doors. I would have been fine either way but again, some added function never hurts.
But now we have more options for knob placement. Knob size will obviously play a factor, but I think that versions two and three are my favorite but I’m open to all of them.


What is your vote?? I won’t be opening and closing these a ton so don’t worry too much about the placement being near the edge. In the meantime, let me show you some actual hardware options I’m looking at.

1. Round Wooden Coat Hook | 2. Mid Century Ball Knob Brass Hardware | 3. Black Brass Knob | 4. Solid Brass Cabinet Knob | 5. Tall Mushroom Cabinet Knob | 6. Knurled Knob | 7. Teakhook Knob | 8. Teardrop Door Pull | 9. Gateway Ring Pull | 10. Larkin Finger Pull | 11. Solid Oak Drawer Pull | 12. Dish Knob | 13. Circle Drawer Knob | 14. Solid Brass Cabinet Knob | 15. Round Cabinet Knob
I love #2 since it’s real small and works with the micro look but #8 and #14 are great for that too. #1 and #15 would need to be stained and I’m not 100% into them. I’ve loved #6 forever and love that it comes in a matte bronze. That could give it some instant age! What do you all think? Do any of you have cool vintage hardware resources?
So that’s where I’m at in my cabinet bench process and my secret ploy to get all of y’all’s advice! Can’t wait to chat in the comments.
Love you, mean it.
The post Jess’ DIY Bench 2.0 – Her Solution To Her Ugly Electronics (Plus An Ask The Audience) appeared first on Emily Henderson.